Custom Docker Images
Custom Docker Images
Vellum Workflows are designed to run in a sandboxed environment. By default, the Vellum Python SDK uses a default Docker Image to run Workflows generated by the UI and pushed by the user from the CLI. However, sometimes you may want to use pre-existing logic from the rest of your repository, or some bespoke binaries that don’t translate well to the currently supported Vellum SDK languages. In these cases, you can use a custom Docker Image to run your Workflow.
Configuring a Custom Docker Image
To configure a custom Docker Image for a Vellum Workflow, you should first create a Dockerfile in the root of your Workflow module.
There are few important things to note about this Dockerfile:
- You must inherit from the
vellumai/python-workflow-runtimeimage in order to run the Workflow on our infrastructure. - You have the flexibility to add any other dependencies you need to the image.
- The
vellum_start_servercommand is required to start the Vellum Server.
Including Custom Nodes in Your Docker Image
In addition to custom code and utilities, you can also include Custom Nodes that will be available in the Workflow UI. Custom Nodes allow you to extend the functionality of your Workflows with specialized logic that isn’t available in the standard node library.
To include custom nodes in your Docker Image, you must organize them in a specific directory structure:
- All Custom Nodes must live under a directory called
vellum_custom_nodesbefore pushing the image. This is a strict requirement for the Nodes to be recognized by the Vellum platform.
Once your custom Docker image with Custom Nodes is pushed and configured, select the image that you just pushed from the Workflow builder settings and these Nodes will automatically appear in the Workflow UI side Node panel, allowing you to drag and drop them into your Workflows just like any other Node.
Building and Pushing Your Custom Image
Once you have your Dockerfile, follow these steps to build and push your image to Vellum:
Configuring Your Workflow to Use the Custom Image
Once you’ve pushed the image, you can configure your Vellum Workflow to use the custom Docker Image by adding the following to your pyproject.toml file:
This will tell Vellum to use the custom Docker Image when running the defined Workflow.
Using Custom Docker Images in the Workflow UI
After pushing your custom Docker image, you can select it in the Workflow Sandbox Settings. To do this:
- Open your Workflow in the Workflow Sandbox
- Click on the Settings button to open the Workflow Sandbox Settings modal
- In the “Container Image” section, you can select your custom Docker image from the dropdown
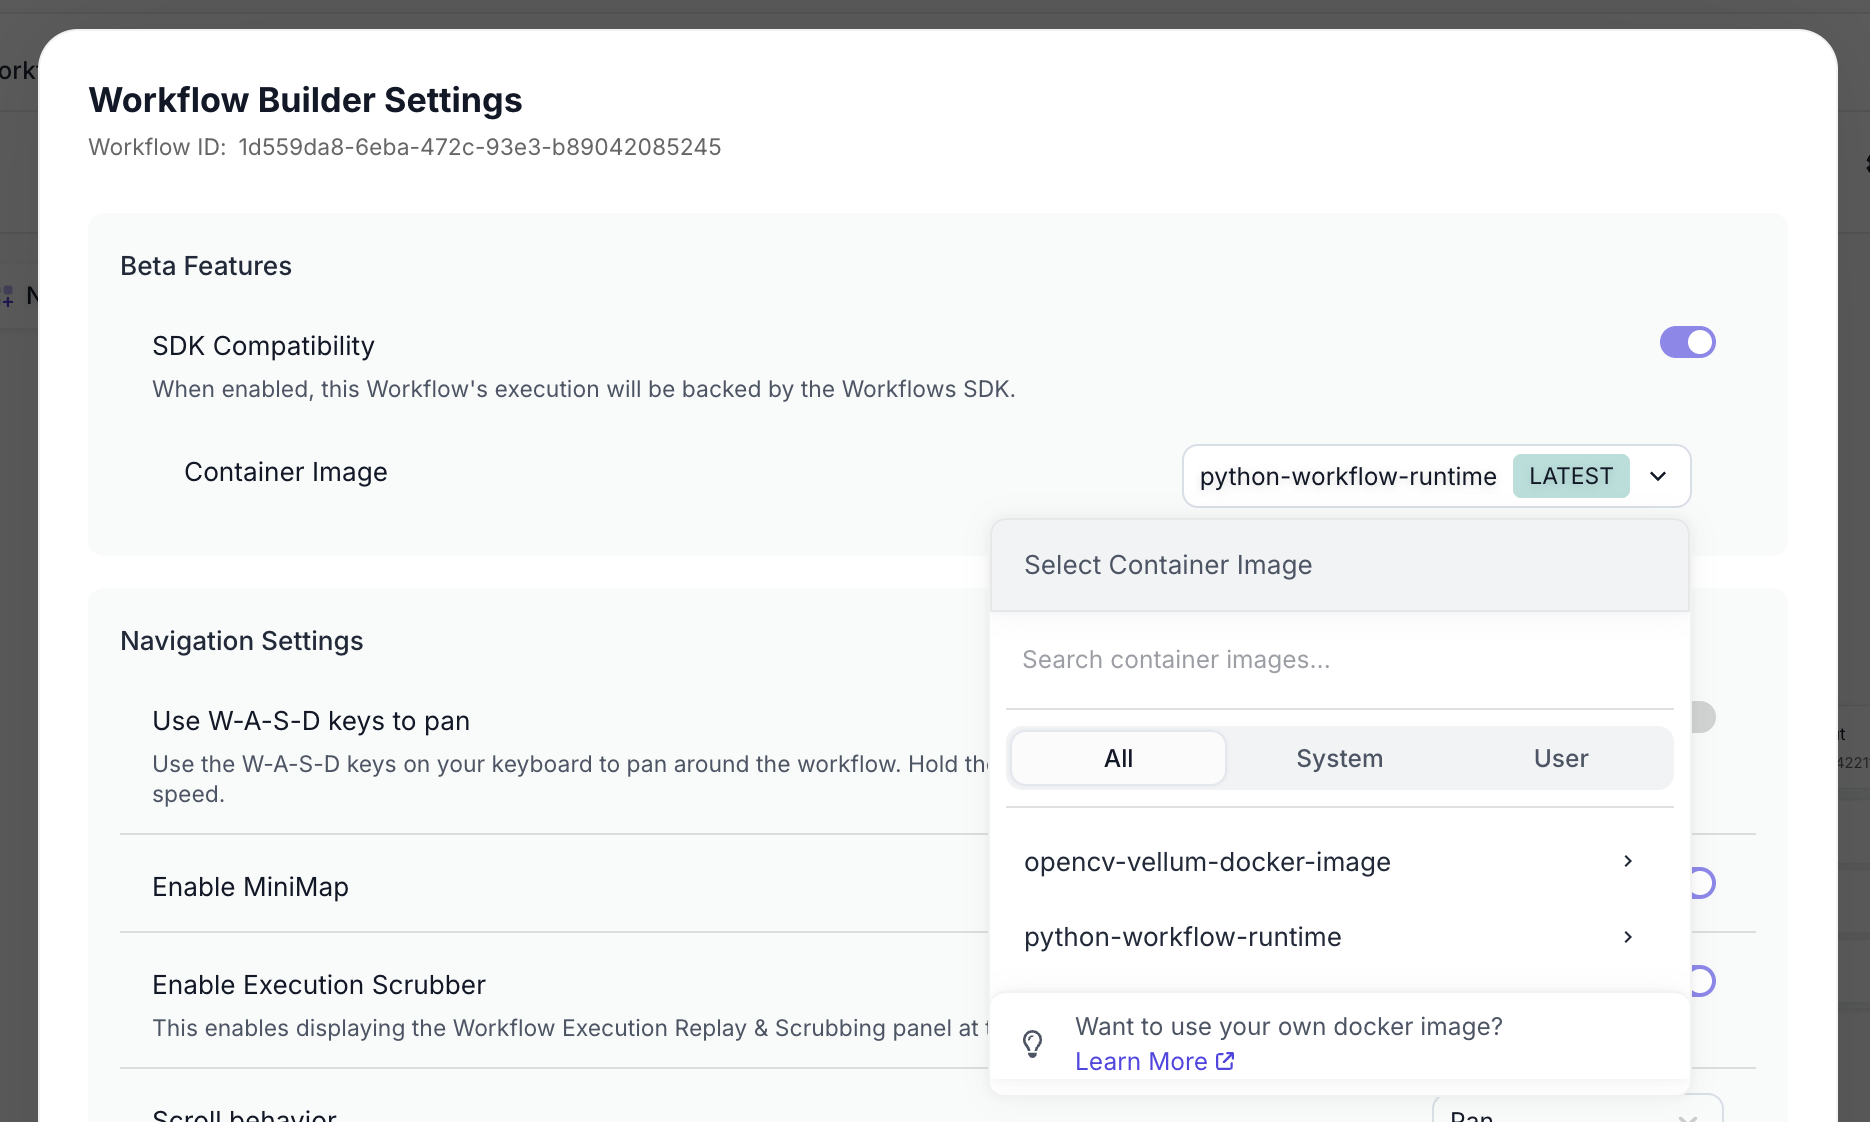
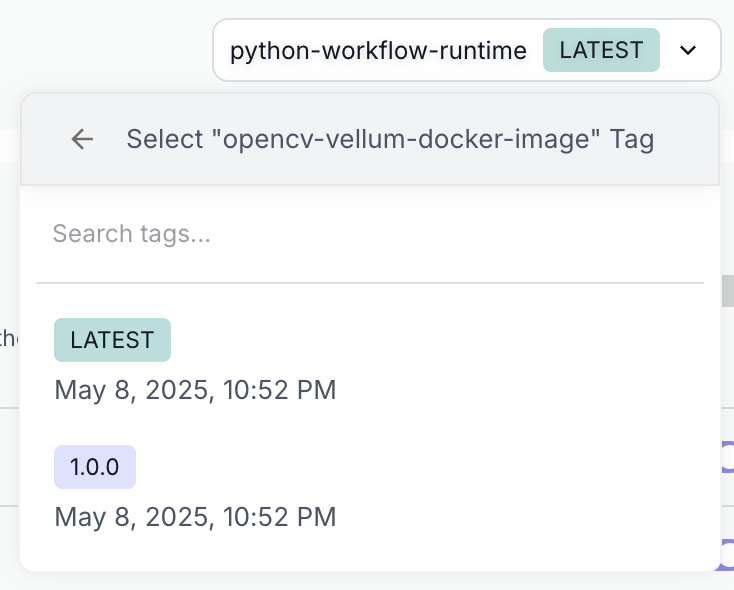
You can select from available system images or your own custom images. The dropdown allows you to choose the specific image tag as well.
If you had defined custom nodes within that custom Docker image, once you’ve selected your custom Docker image, these custom nodes will automatically appear in the Workflow UI side node panel, allowing you to drag and drop them into your Workflows just like any other node.
Usage Limits
Custom Docker images in Vellum have the following resource limits:
- Memory Limit: 2048MB (2GB) per instance
- Platform: Images must be built for
linux/amd64platform
If you need higher memory limits for your custom Docker images, please contact us at support@vellum.ai and we can work with you to accommodate your requirements.
These limits ensure optimal performance and resource allocation across the Vellum platform while supporting most common use cases for custom workflows.