

Defining Control Flow
Here are some examples of how to represent different graphs using the Vellum Workflows SDK.
Single Node Workflow
A single Node Workflow is the simplest possible Workflow, consisting of just one Node.

Serial Execution Between Two Nodes
Two Nodes connected in sequence, where the output of the first Node flows into the second Node. This is a fundamental pattern in Workflow design where a downstream operation directly depends on the output of an upstream operation.

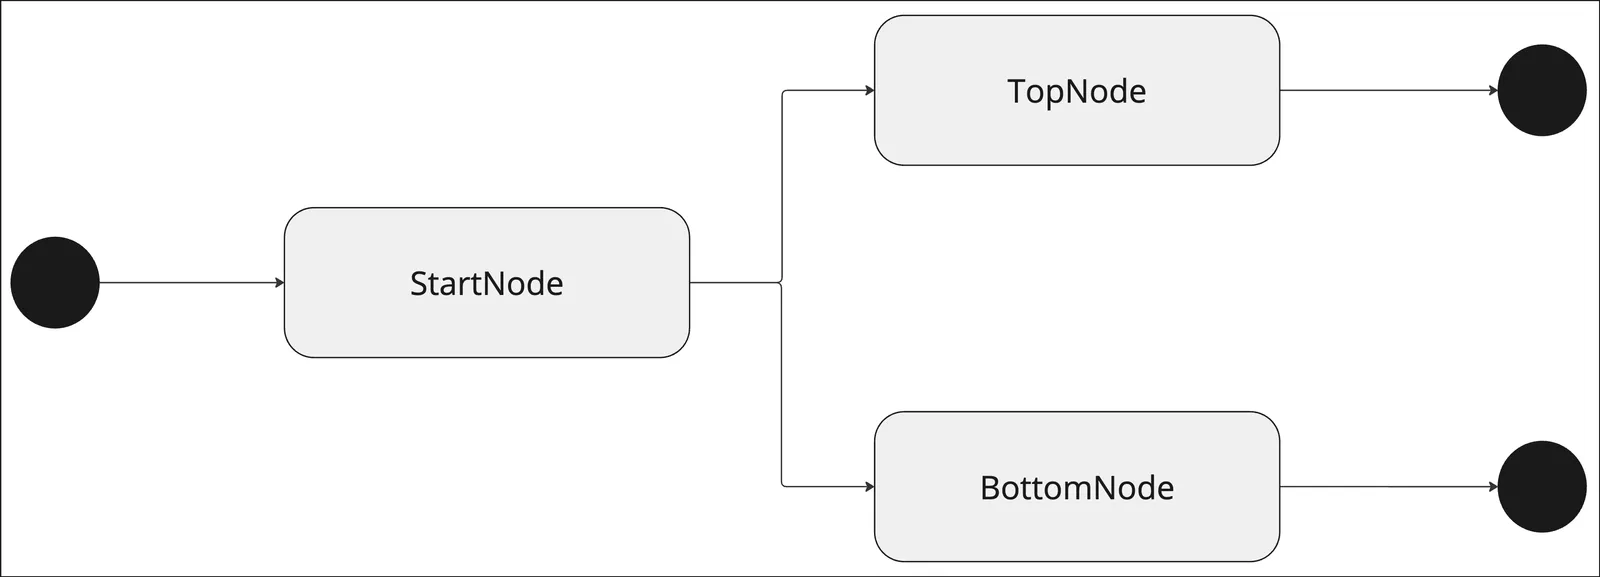
Single Node Branches to Two Parallel Nodes
Here a single Node branches into two parallel execution paths, allowing multiple operations to run independently after the initial Node completes. This pattern is useful when you need to perform parallel processing or handle multiple aspects of a Workflow simultaneously.
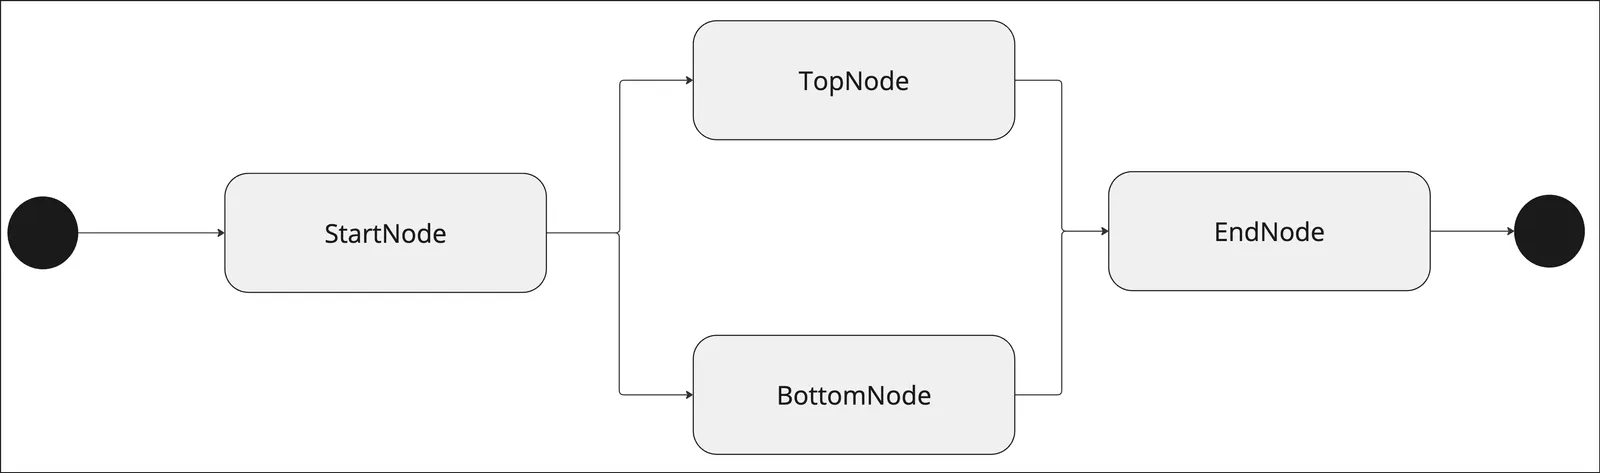
Two Parallel Nodes Merge into One Node
Here two parallel execution paths merge back together into a single Node. This pattern is useful when you need to combine the results of multiple parallel operations before proceeding with the rest of the Workflow.
Conditional Routing with Ports
Ports enable conditional routing in workflows by allowing nodes to direct execution flow based on specific conditions. This is particularly useful for implementing branching logic where different paths should be taken based on the results of upstream nodes.
In this example, the ConditionalNode evaluates a condition and routes execution to either SomeNode (if the condition is true) or SomeOtherNode (if the condition is false). Both paths then converge at the FinalOutputNode.
For more details on how to define conditions and work with ports, see the Ports and Conditionals section in Core Concepts.
Loops
Loops are a powerful pattern in Workflow design that allow you to repeat a series of operations until a certain condition is met. Many agentic AI systems tend to include loops.

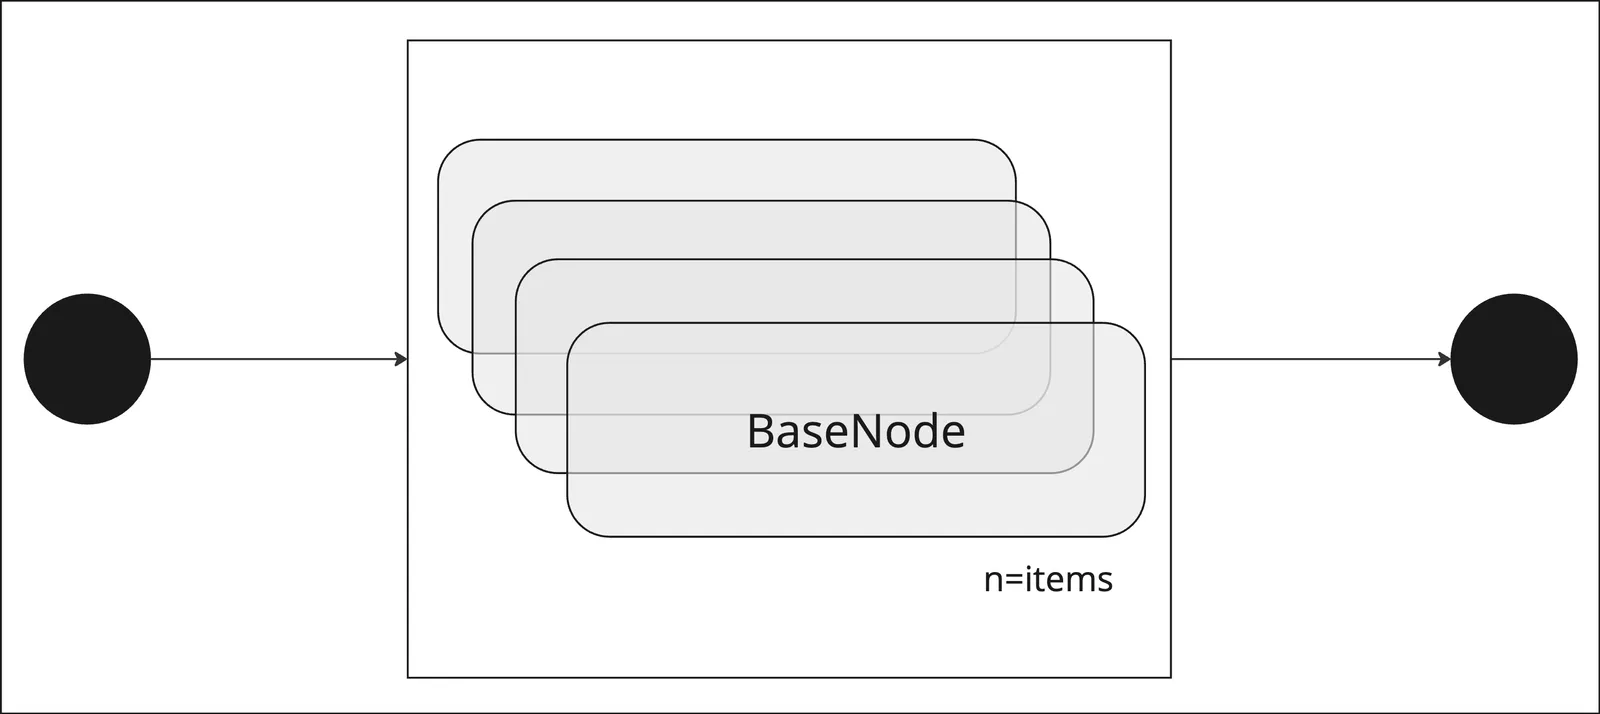
Map
The Map pattern is useful when you need to apply the same operation to a list of items.
Merge Strategies for Parallel Execution
When you have parallel execution paths that converge into a single downstream node, different node types handle this convergence differently. Understanding these merge strategies is crucial for building robust workflows.
Prompt Nodes: Use AWAIT_ATTRIBUTES
For Prompt Nodes, it’s recommended to use AWAIT_ATTRIBUTES merge strategy, which waits only for the specific input attributes that the node actually uses:
Custom Nodes: Default AWAIT_ATTRIBUTES Behavior
Custom Nodes (extending BaseNode) automatically use AWAIT_ATTRIBUTES by default, waiting only for their referenced inputs:
Merge Nodes: Use AWAIT_ALL
For dedicated merge operations, use AWAIT_ALL to ensure all upstream nodes complete before proceeding:
When you need to merge parallel paths before node types that don’t support automatic input waiting (like Templating Nodes), you should use a MergeNode with AWAIT_ALL strategy first.