Release Tags
Introduction to Deployment Release Tags
As you start having many versions of a Prompt or Workflow, being able to manage these deployment releases becomes an important consideration.
Vellum provides first-class support for managing releases across different Environments. Each Deployment maintains a separate Release history per Environment, allowing you to deploy different versions of the same Prompt/Workflow to each Environment independently.
In Vellum, you have multiple ways to manage releases so you can easily promote prompt / workflow changes from your development or staging environments into production with as much flexibility or control as required by your team.
Recommended Approach
We recommend using the LATEST tag (or specifying no tag, which defaults to LATEST) for most use cases. This approach automatically incorporates any changes that you deploy from your Prompt or Workflow Sandbox, simplifying your deployment process.
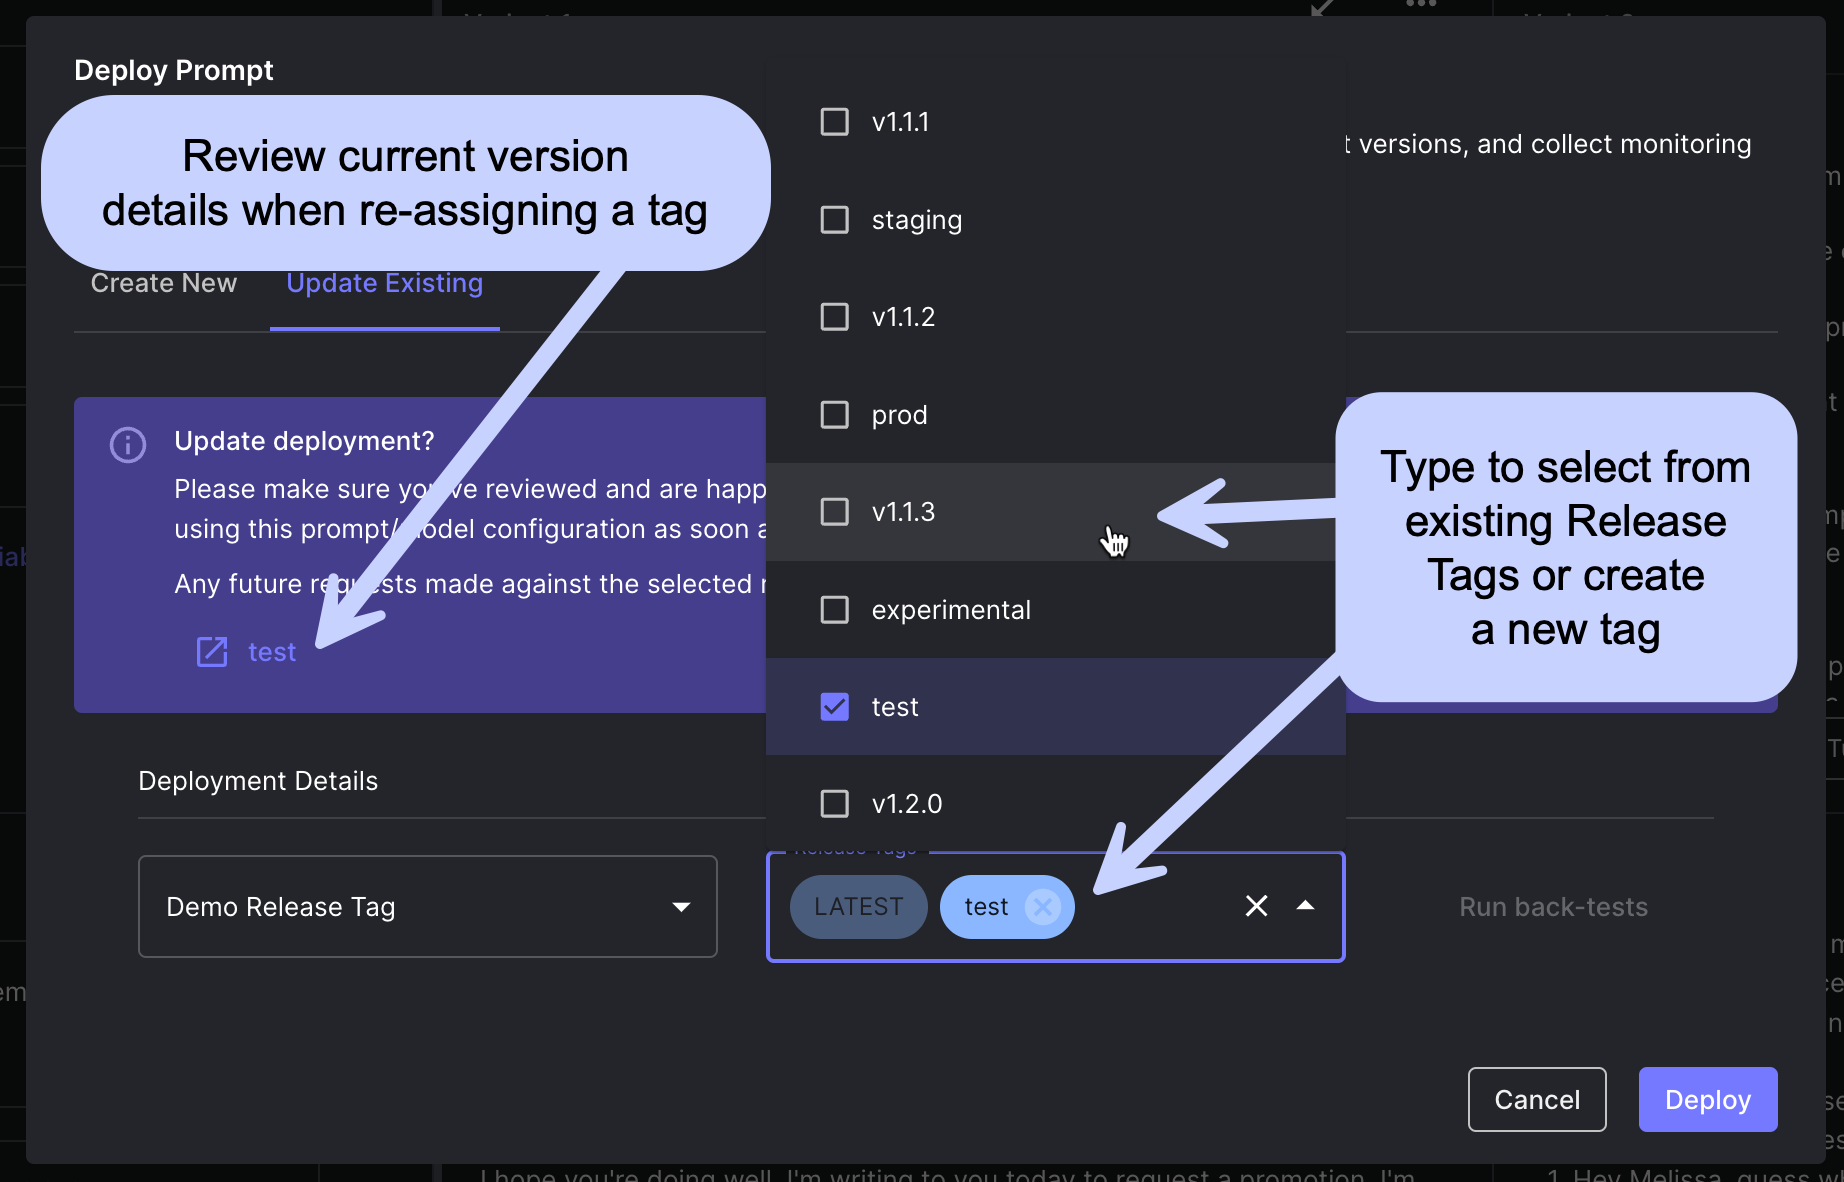
For more granular control, use Release Tags following semantic versioning conventions. Only use custom Release Tags when you need super fine-grained control over your deployment versions.
This page highlights Prompt Deployments but the same holds true for managing your Workflow Deployment releases
Three Ways to Release Prompts or Workflows
1. Don’t Specify a Release Tag and Always Use Latest
Every time you create a new Prompt or Workflow Deployment or update an existing one, Vellum will automatically assign it as latest.
In this approach, you always point to the latest prompt or workflow available for a given Deployment by making your Vellum API requests without providing a specific Release Tag.
This method simplifies your deployment process by automatically incorporating any changes that you deploy from your Prompt or Workflow Sandbox.
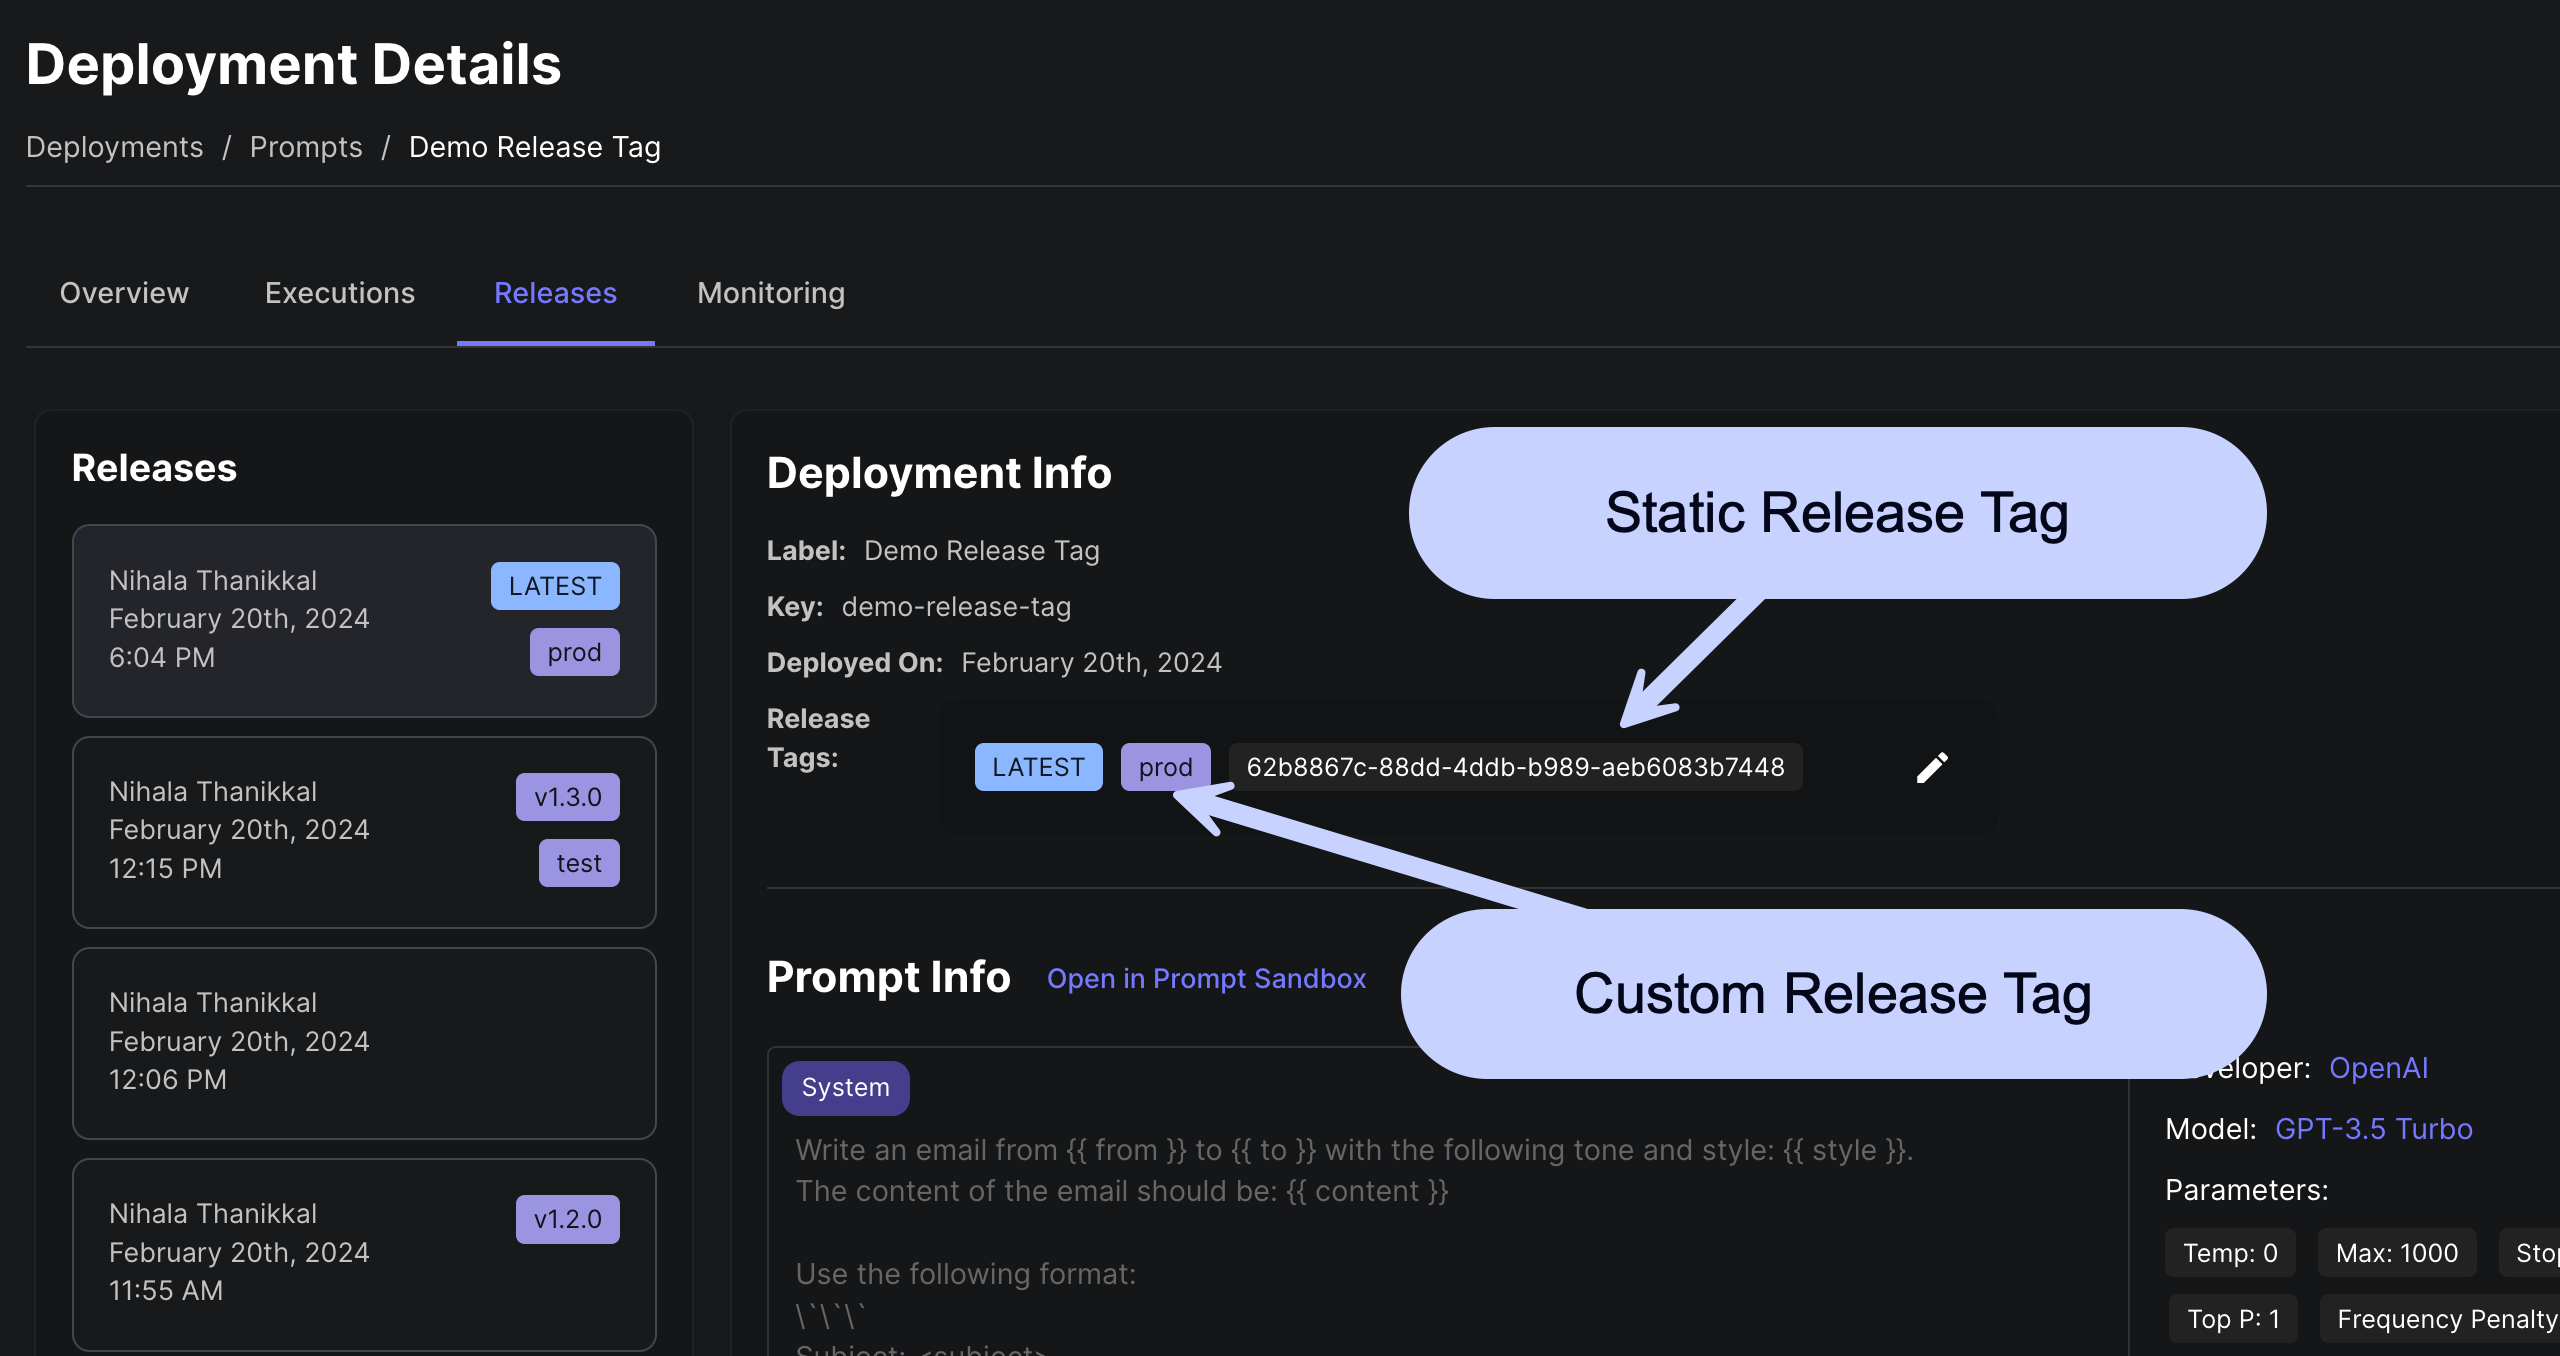
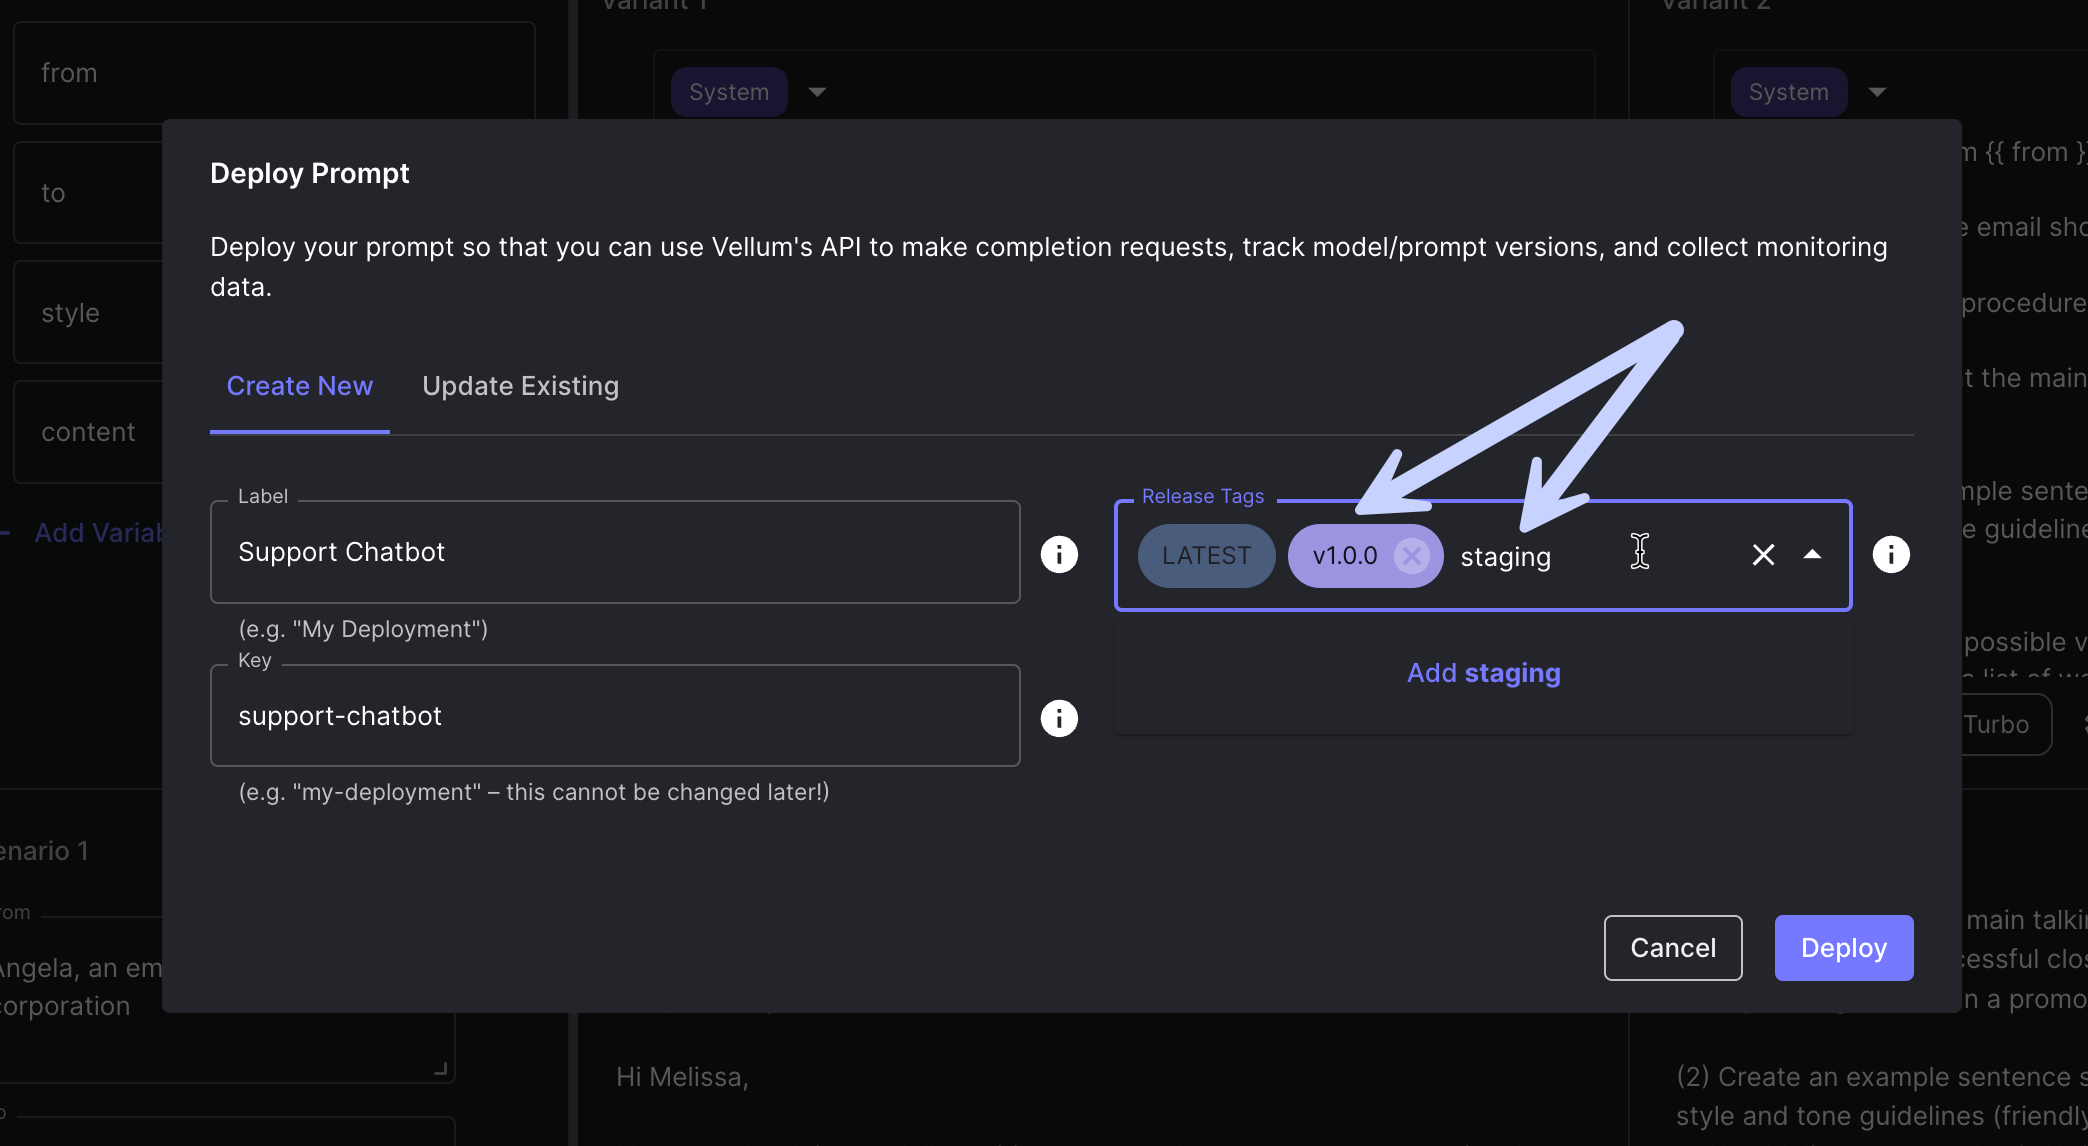
2. Use Custom Release Tags
For more flexibility, Vellum lets you define Custom Release Tags. Custom Release Tags are floating tags that you define and can be moved by authorized users directly within the Vellum app.
The most common use case for Custom Release Tags is to follow semantic versioning conventions (e.g., v1.0.0, v1.0.1, etc.). This allows you to create a structured release process that can be easily understood by your team.
You might also use Custom Release tags to A/B test different versions of the same Prompt or Workflow. For example, you might have Release Tags “Variant A” and “Variant B”, then have your application layer split traffic between these two tags to test which performs better.
Note that Custom Release Tags follow a specific format: less than or equal to 150 characters, begin and end with a Regex word character (i.e., letter, number, or underscore), contain only word characters, dashes or dots, and do not contain more than one dot in a row
3. Use Static Release Tags
Every time you create a new Deployment or update an existing one, Vellum creates a unique Static Release Tag tied to that version.
When using Static Release Tags to manage your releases, you can control version increments through code to ensure a structured and controlled release process.
This method is ideal if your organization prioritizes strict version management and you want to avoid accidental updates or changes.
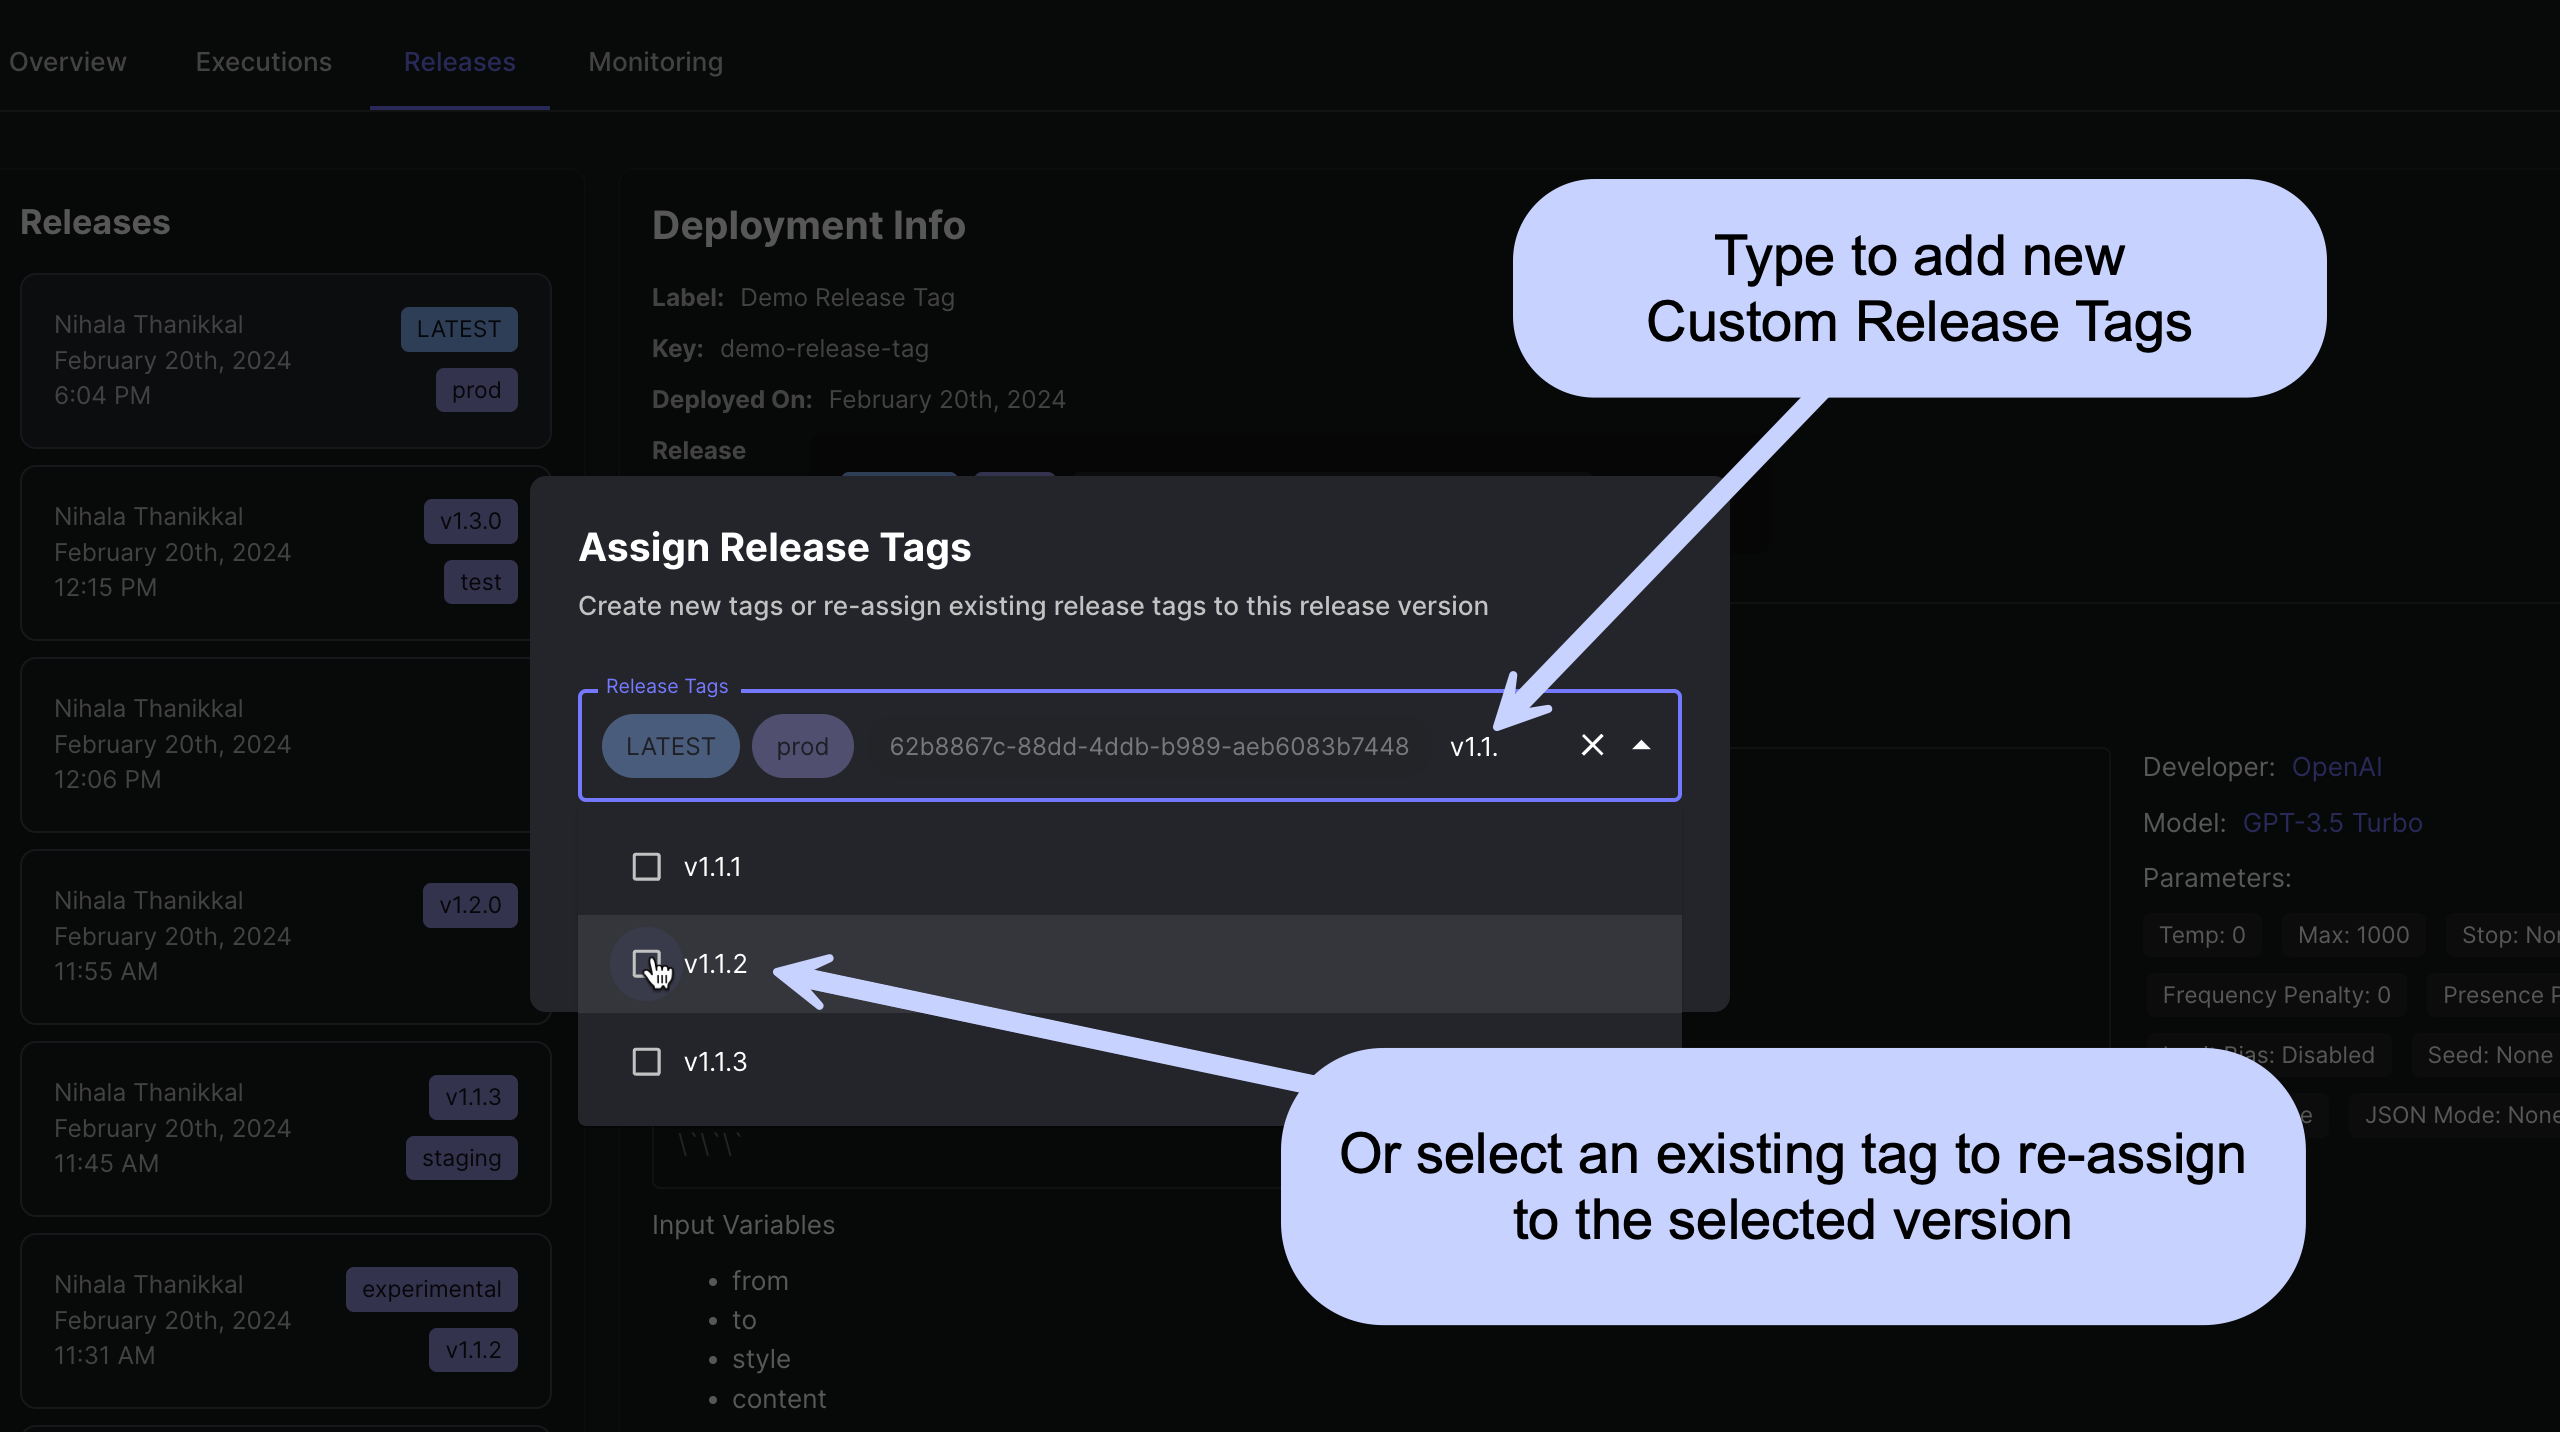
Creating a Custom Release Tag
Release tags can be created:
-
Within the Create New or Update Existing tabs of the Deploy Prompt modal in a Prompt Sandbox or Deploy Workflow modal in a Workflow Sandbox. You can select which Environment(s) to deploy to, creating separate releases for each selected Environment.
-
By opening the Assign Release Tags modal from the Releases tab of the Deployment Details page
Environment Context: When creating or updating Release Tags, remember that each Environment maintains its own separate Release history. The active Environment shown in the Environment picker at the top of the page determines which Environment’s releases you’re viewing and managing.
Updating a Custom Release Tag
Release tags can be updated:
-
Within the Update Existing tab of the Deploy Prompt modal in a Prompt Sandbox or Deploy Workflow modal in a Workflow Sandbox
-
By opening the Assign Release Tags modal from the Releases tab of the Deployment Details page
Pinning to a Release Tag in Code
Both the Vellum execute_prompt and execute_workflow API’s accept an optional release_tag parameter to pin your request to a specific release tag. When release tags are updated via the Vellum app to point to new versions of a prompt or workflow, these changes will automatically reflect in these requests.
If no release_tag parameter is provided, the request will default to the latest version of that Deployment within the Environment context of the API key being used.
More details on how to do this: Vellum API Docs