Deployment Lifecycle Management
Overview
Vellum’s deployment lifecycle management provides comprehensive tools for managing your Prompt and Workflow deployments across different environments. With first-class Environment support, you can maintain proper isolation between development, staging, and production while streamlining your deployment workflow.
Key Concepts
Environments
Environments provide complete isolation for your deployment stages. Each Environment maintains:
- Separate API keys for secure access control
- Independent Release histories
- Isolated document indexes and monitoring data
- Environment-specific configurations
You can learn more about Environments here.
Deployments
A Deployment represents a specific Prompt or Workflow that can be invoked via API. Each Deployment can have different Releases across different Environments, allowing you to test changes thoroughly before promoting them to production.
Releases
A Release is a specific version of a Deployment in a particular Environment. Releases are created when you deploy from a Sandbox and can be promoted between Environments.
Deployment Workflow
1. Initial Development
Start by creating and testing your Prompt or Workflow in a Sandbox within your Development Environment:
- Build and test your Prompt or Workflow in the Sandbox
- Validate functionality with test scenarios
- Deploy to your Development environment when ready
2. Multi-Environment Deployment
When deploying from a Sandbox, you can now deploy to multiple Environments simultaneously:
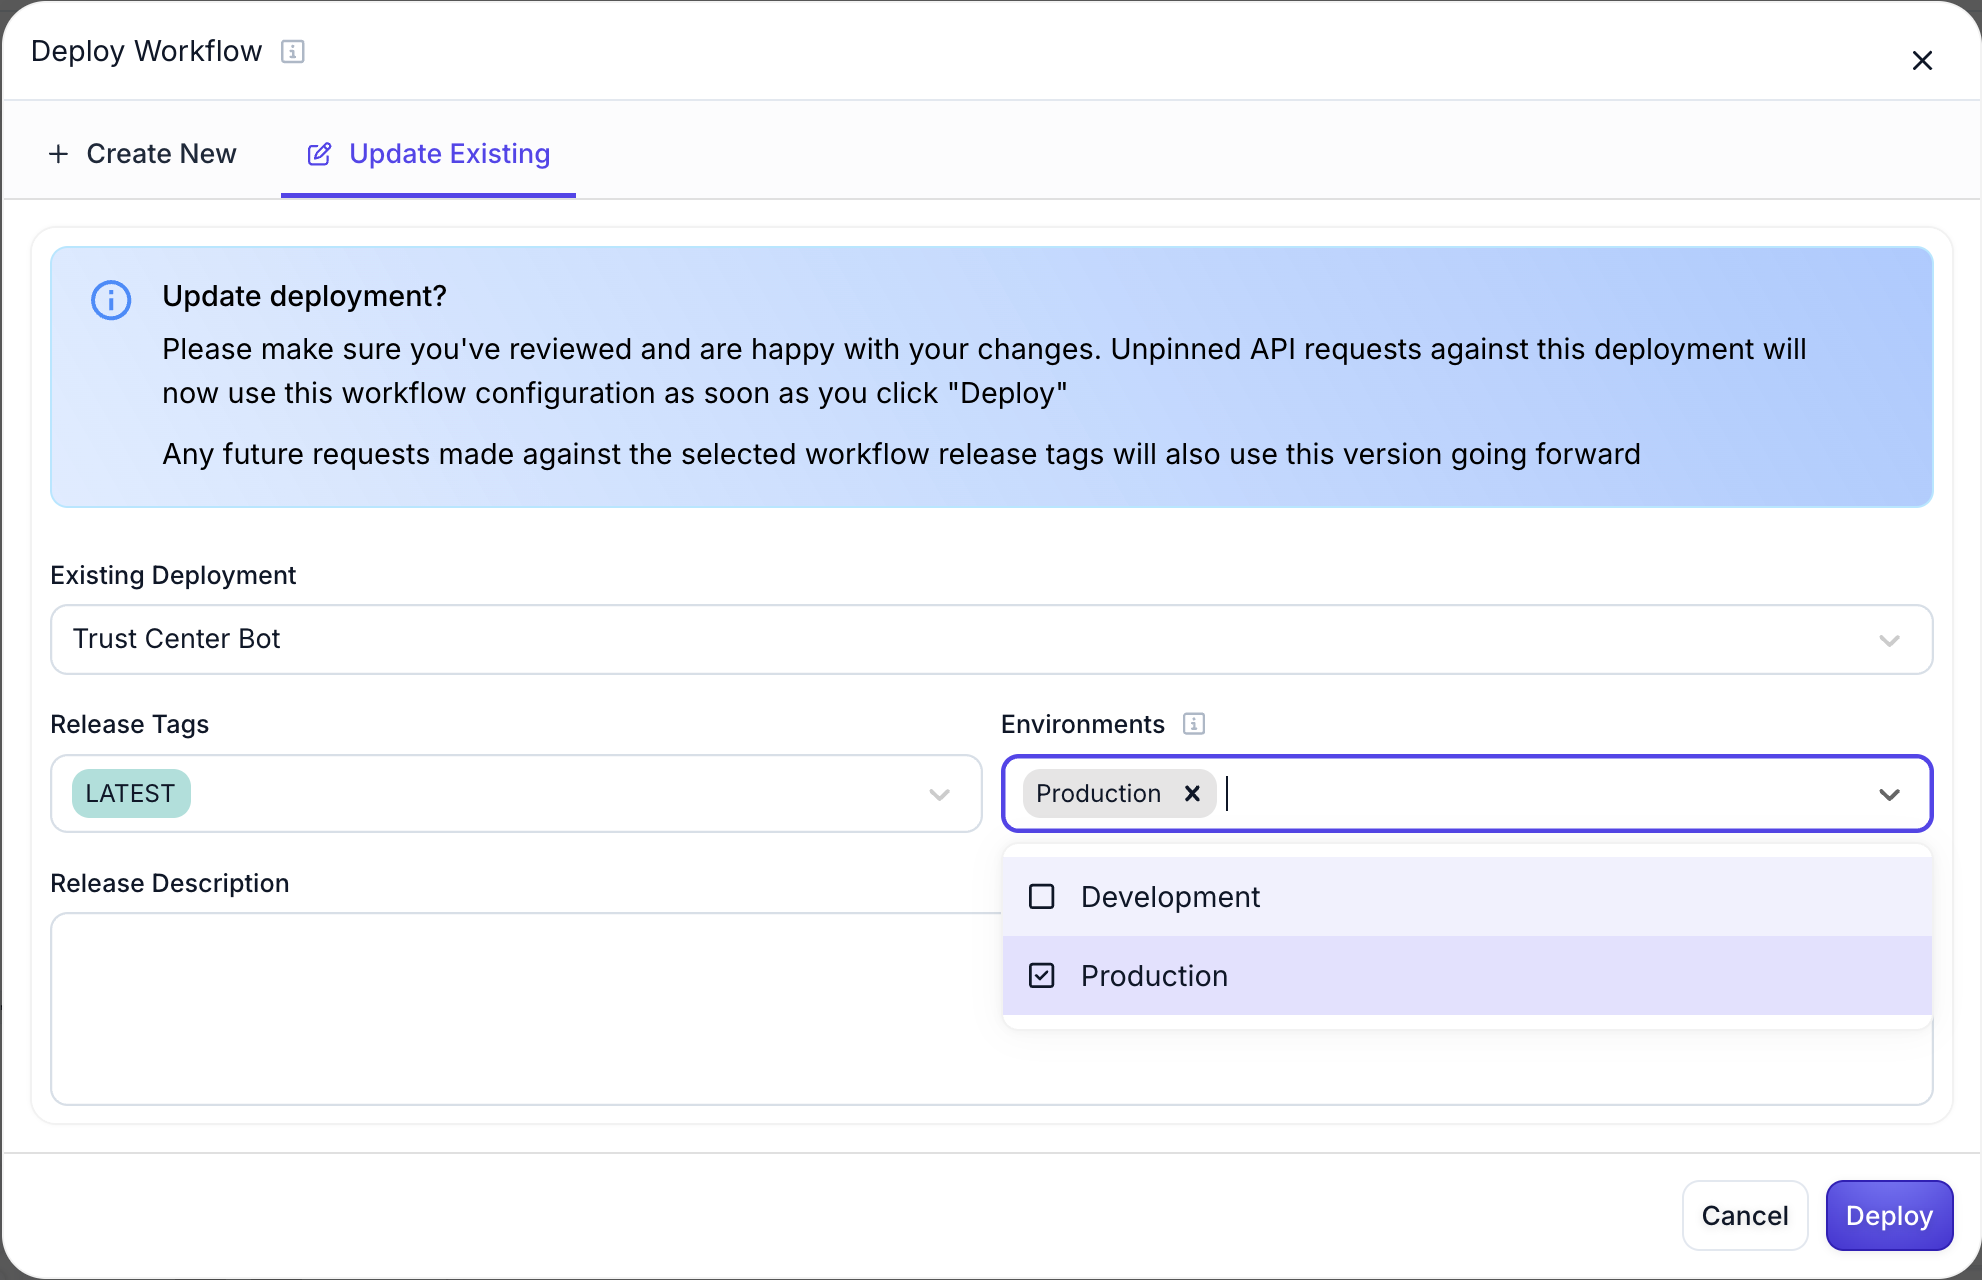
This feature is useful when you want to:
- Deploy to Development and Staging simultaneously
- Push updates to multiple testing Environments
- Maintain consistency across Environments during initial deployment
3. Release Promotion
After testing a Release in one Environment, you can promote it to other Environments:
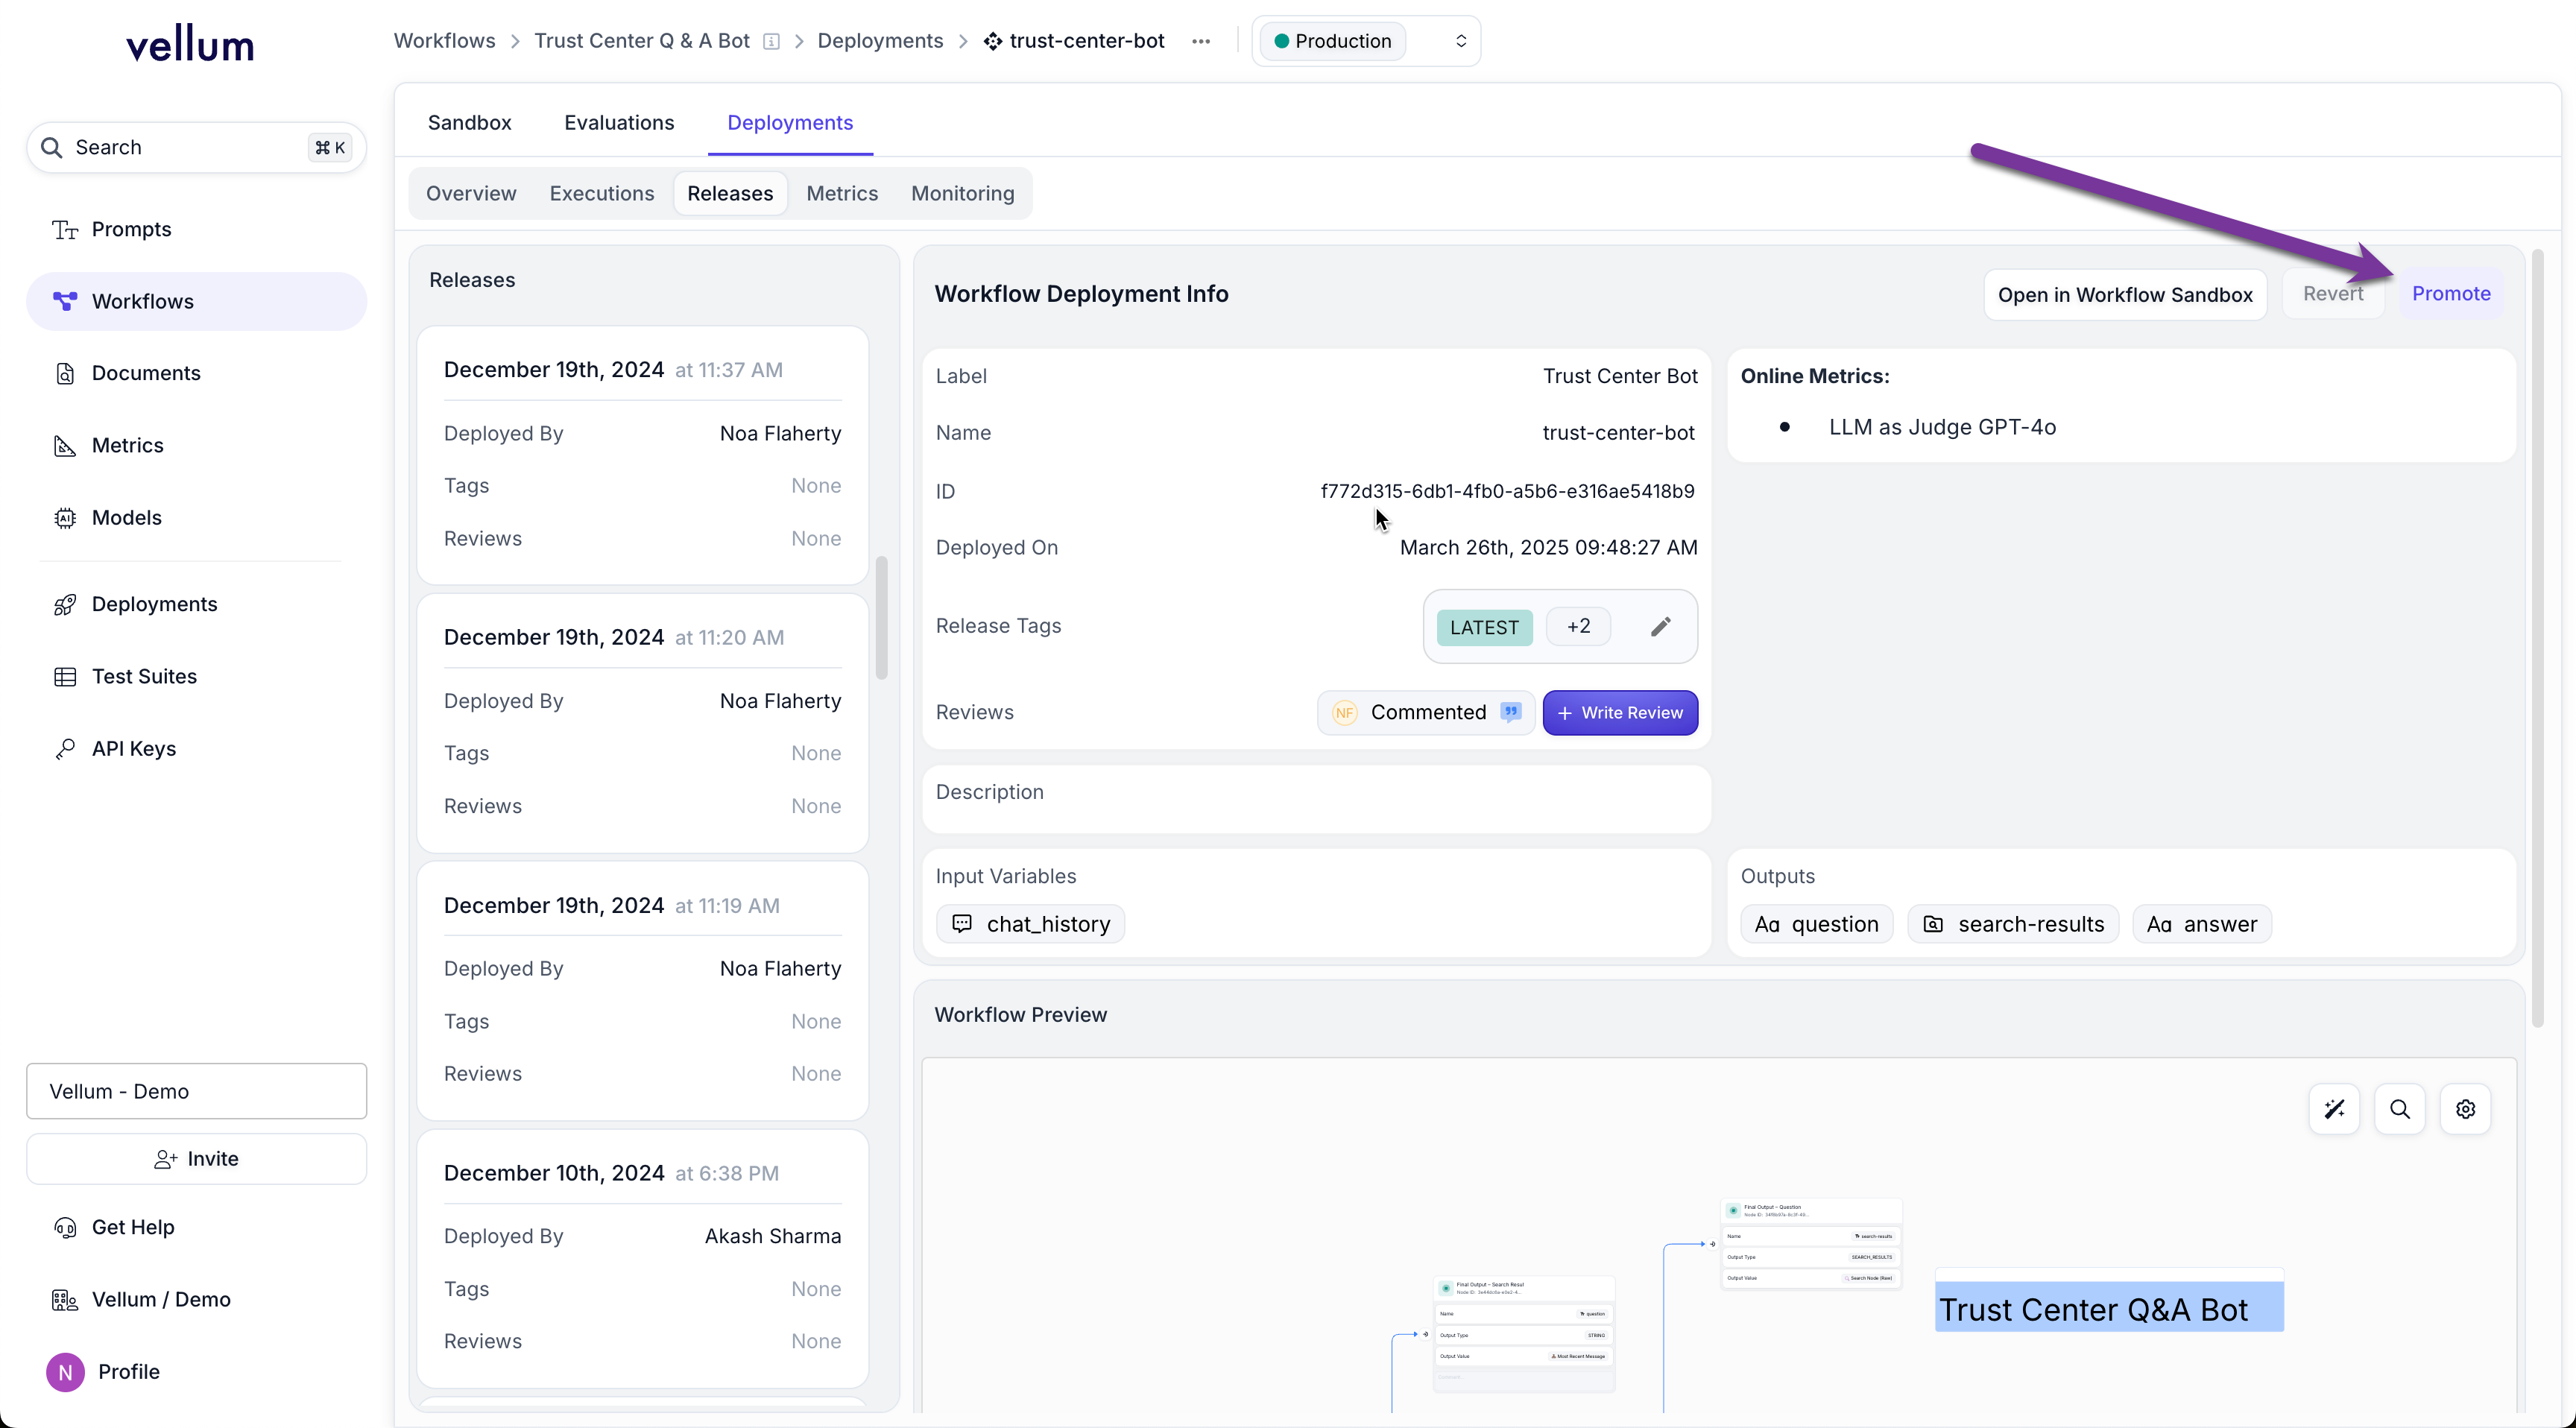
To promote a Release:
- Navigate to the Release you want to promote
- Click the “Promote” button
- Select the target Environment(s) in the promotion modal
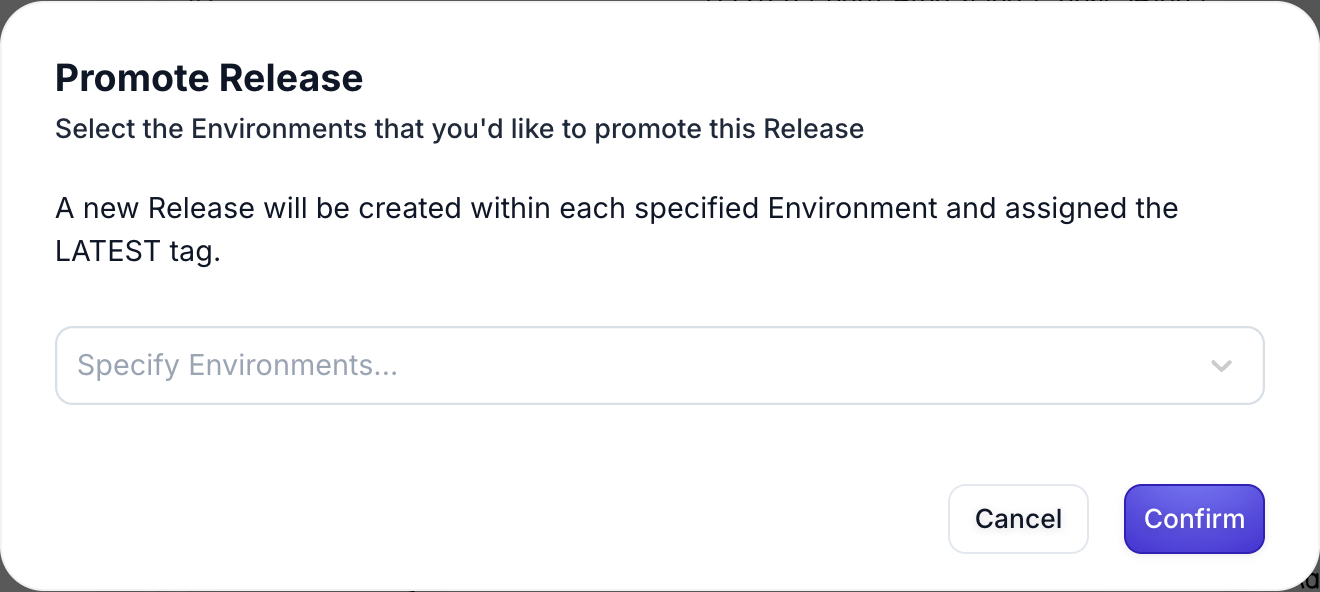
Upon promotion, a new Release will be created in each selected Environment, maintaining a complete audit trail of your deployment history.
Best Practices
Environment Strategy
- Development: Active development and experimentation
- Staging: Pre-production testing and validation
- Production: Live, customer-facing deployments
Deployment Approach
We recommend using one Deployment per Sandbox rather than creating separate deployments for each Environment. This approach:
- Reduces complexity in managing multiple deployments
- Provides better organization and visibility
- Takes full advantage of Environment-level isolation
- Simplifies the promotion process between Environments
Release Management
- Use descriptive Release Tags following semantic versioning conventions
- Test thoroughly in Development and Staging before promoting to Production
- Maintain clear documentation of changes in each release
- Use the LATEST tag for most deployments to simplify your workflow
API Key Management
- Use separate API keys for each Environment
- Store API keys securely using environment variables or secret management systems
- Regularly rotate API keys, especially for production Environments
- Never use production API keys in development or testing
Version Control and Rollbacks
Release History
Each Environment maintains its own Release history, allowing you to:
- Track all deployments and changes over time
- Compare different versions of your Prompts or Workflows
- Understand the evolution of your deployments
Instant Rollbacks
If issues arise in production, you can immediately rollback to a previous Release using the “revert” button next to the “promote” button. This is the preferred and easiest way to roll back:
- Navigate to the Deployment’s Release history
- Find the previous stable Release
- Click the “revert” button to instantly restore the previous version
No code changes are required for rollbacks, making incident response fast and reliable.
Monitoring and Observability
Environment-Specific Monitoring
Each Environment provides isolated monitoring data:
- Execution logs and performance metrics
- Cost tracking and usage analytics
- Quality scores and evaluation results
- Error rates and latency measurements
Integration with CI/CD
API-Driven Deployments
Integrate deployment lifecycle management into your CI/CD pipeline using Vellum’s API:
- Automate deployments from your build process
- Trigger promotions based on test results
- Implement approval workflows for production deployments
Environment-Scoped API Keys
Use environment-specific API keys in your CI/CD pipeline to ensure:
- Proper isolation between deployment stages
- Secure access control
- Audit trails for automated deployments
For additional support with deployment lifecycle management, contact our support team or refer to the observability documentation for monitoring your deployments in production.