Streamline AI App Development with Vellum's Workflows
About Workflows
Workflows help you quickly prototype, deploy, and manage complex chains of LLM calls and business logic. We solve the “whack-a-mole” problem encountered by companies that use popular open source frameworks to build AI applications, but are scared to make changes for fear of introducing regressions in production.
The Workflows UI consists of a graphical app builder where you can string together various nodes and test various input values through this system. Each prompt can also be tested extensively through Playground & Test Suites. When implemented effectively, Workflows can help you build advanced LLM applications
Connecting Workflow Nodes and Defining Variables
Workflow nodes are connected by linking the output of one node to the input of another node. For any node the variables can be populated either by the results of an upstream node or the values of global variables.
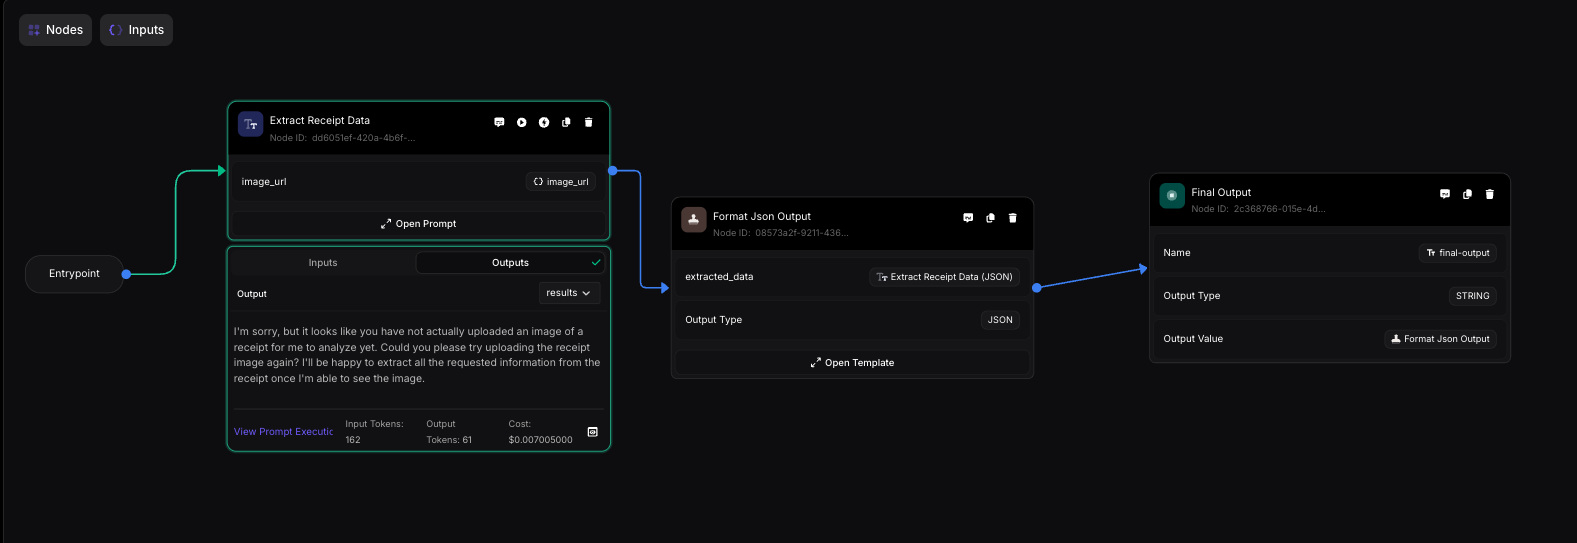
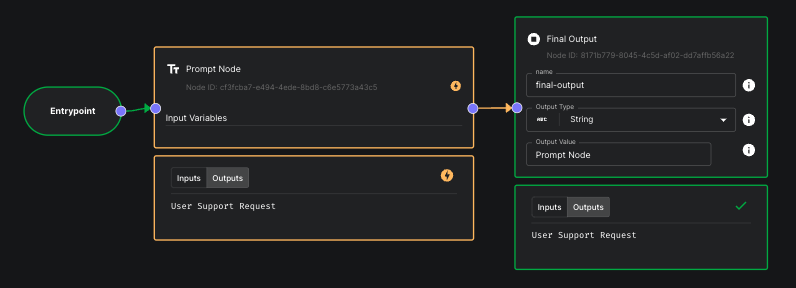
When 2 nodes are successfully connected there’s a solid purple line between the nodes and the connection points turn blue. Here’s an example of a Workflow that’s connected successfully:
Running a Workflow
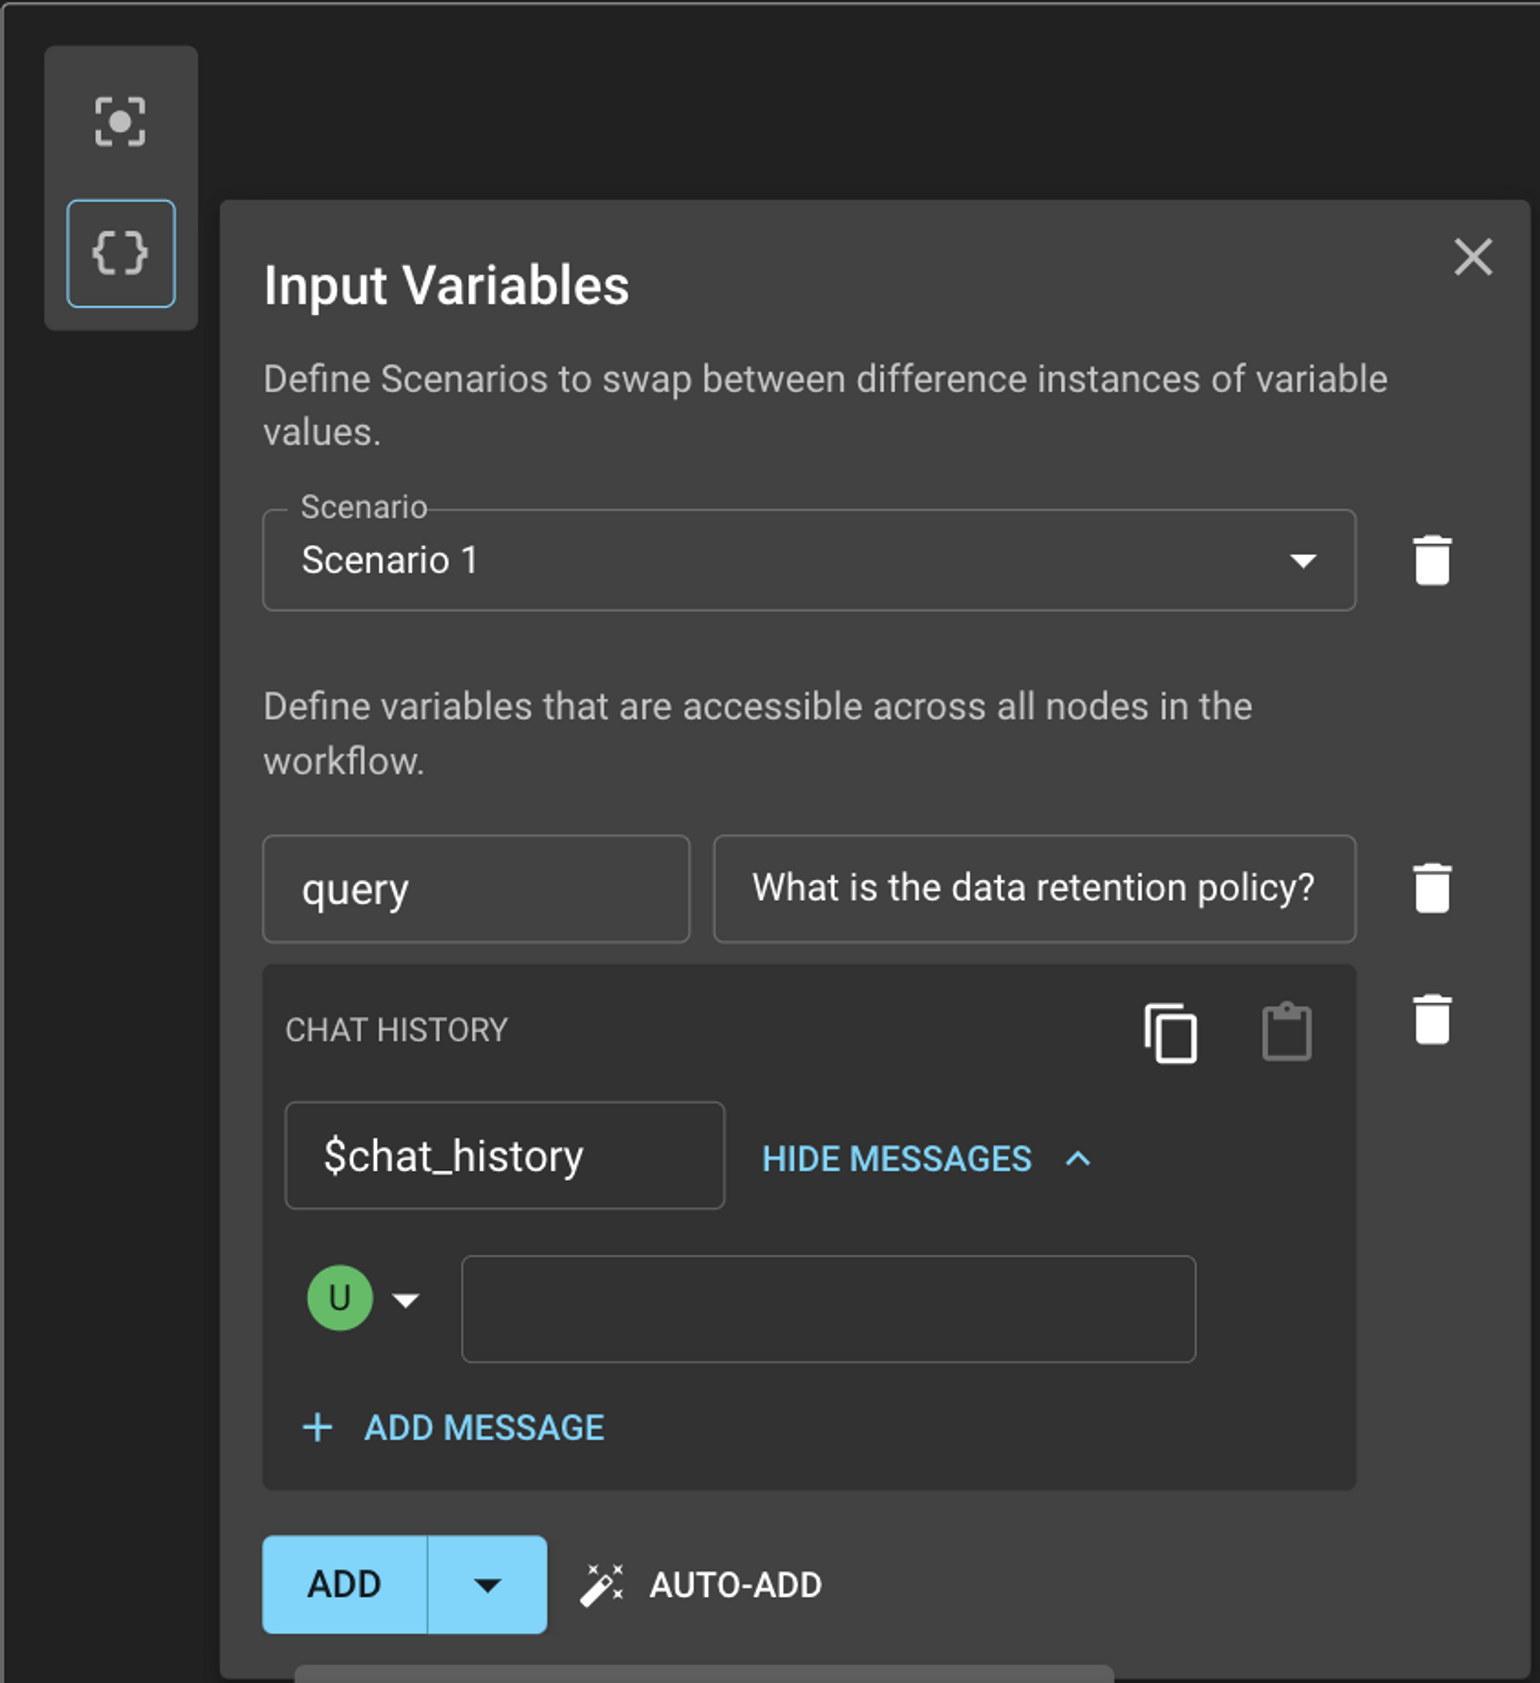
Each variable in a node can either take the value of an upstream node or the value can be defined globally. To define them globally, you can populate them in the Input Variables dropdown before running a Workflow. You can define as many scenarios as you want, each scenario is a unique set of input values that will be sent to the Workflow.
Variables can be added one-by-one using the Add button or automatically using Auto-Add. Auto-Add looks at all the variables in the Workflow and adds them to the scenario.
Once all the variables are selected for each prompt (either as values of upstream nodes or defined globally), you are now ready to Run your Workflow!
When you Run the Workflow (purple button on the top right corner), you will see the execution path of the Workflow in green and the intermediate results at each step of the Workflow. If the results at the end of the Workflow look surprising then may be a good idea to check what the responses look like at each step.
Here’s an example of a Workflow that’s executed successfully:

Cost Tracking in Workflow Sandbox
The Workflow Sandbox provides cost tracking capabilities to help you understand the financial impact of your workflow executions. After running a workflow, you can see the estimated cost of individual nodes, giving you valuable insights for optimization.
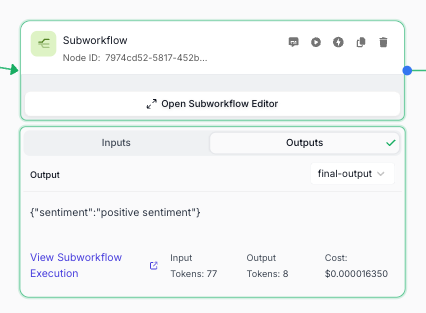
Subworkflow Cost Tracking
Subworkflow Nodes in the Workflow Sandbox now display the aggregate sum of total costs for your workflow. This allows you to quickly identify which subworkflows are contributing most to your overall execution costs.
This cost tracking feature helps you:
- Identify expensive components within your workflow
- Make informed decisions about optimization priorities
- Estimate production costs during development
- Compare different implementation approaches
Cost tracking in the Sandbox is particularly useful during the development phase, allowing you to experiment with different approaches while keeping an eye on potential production costs.
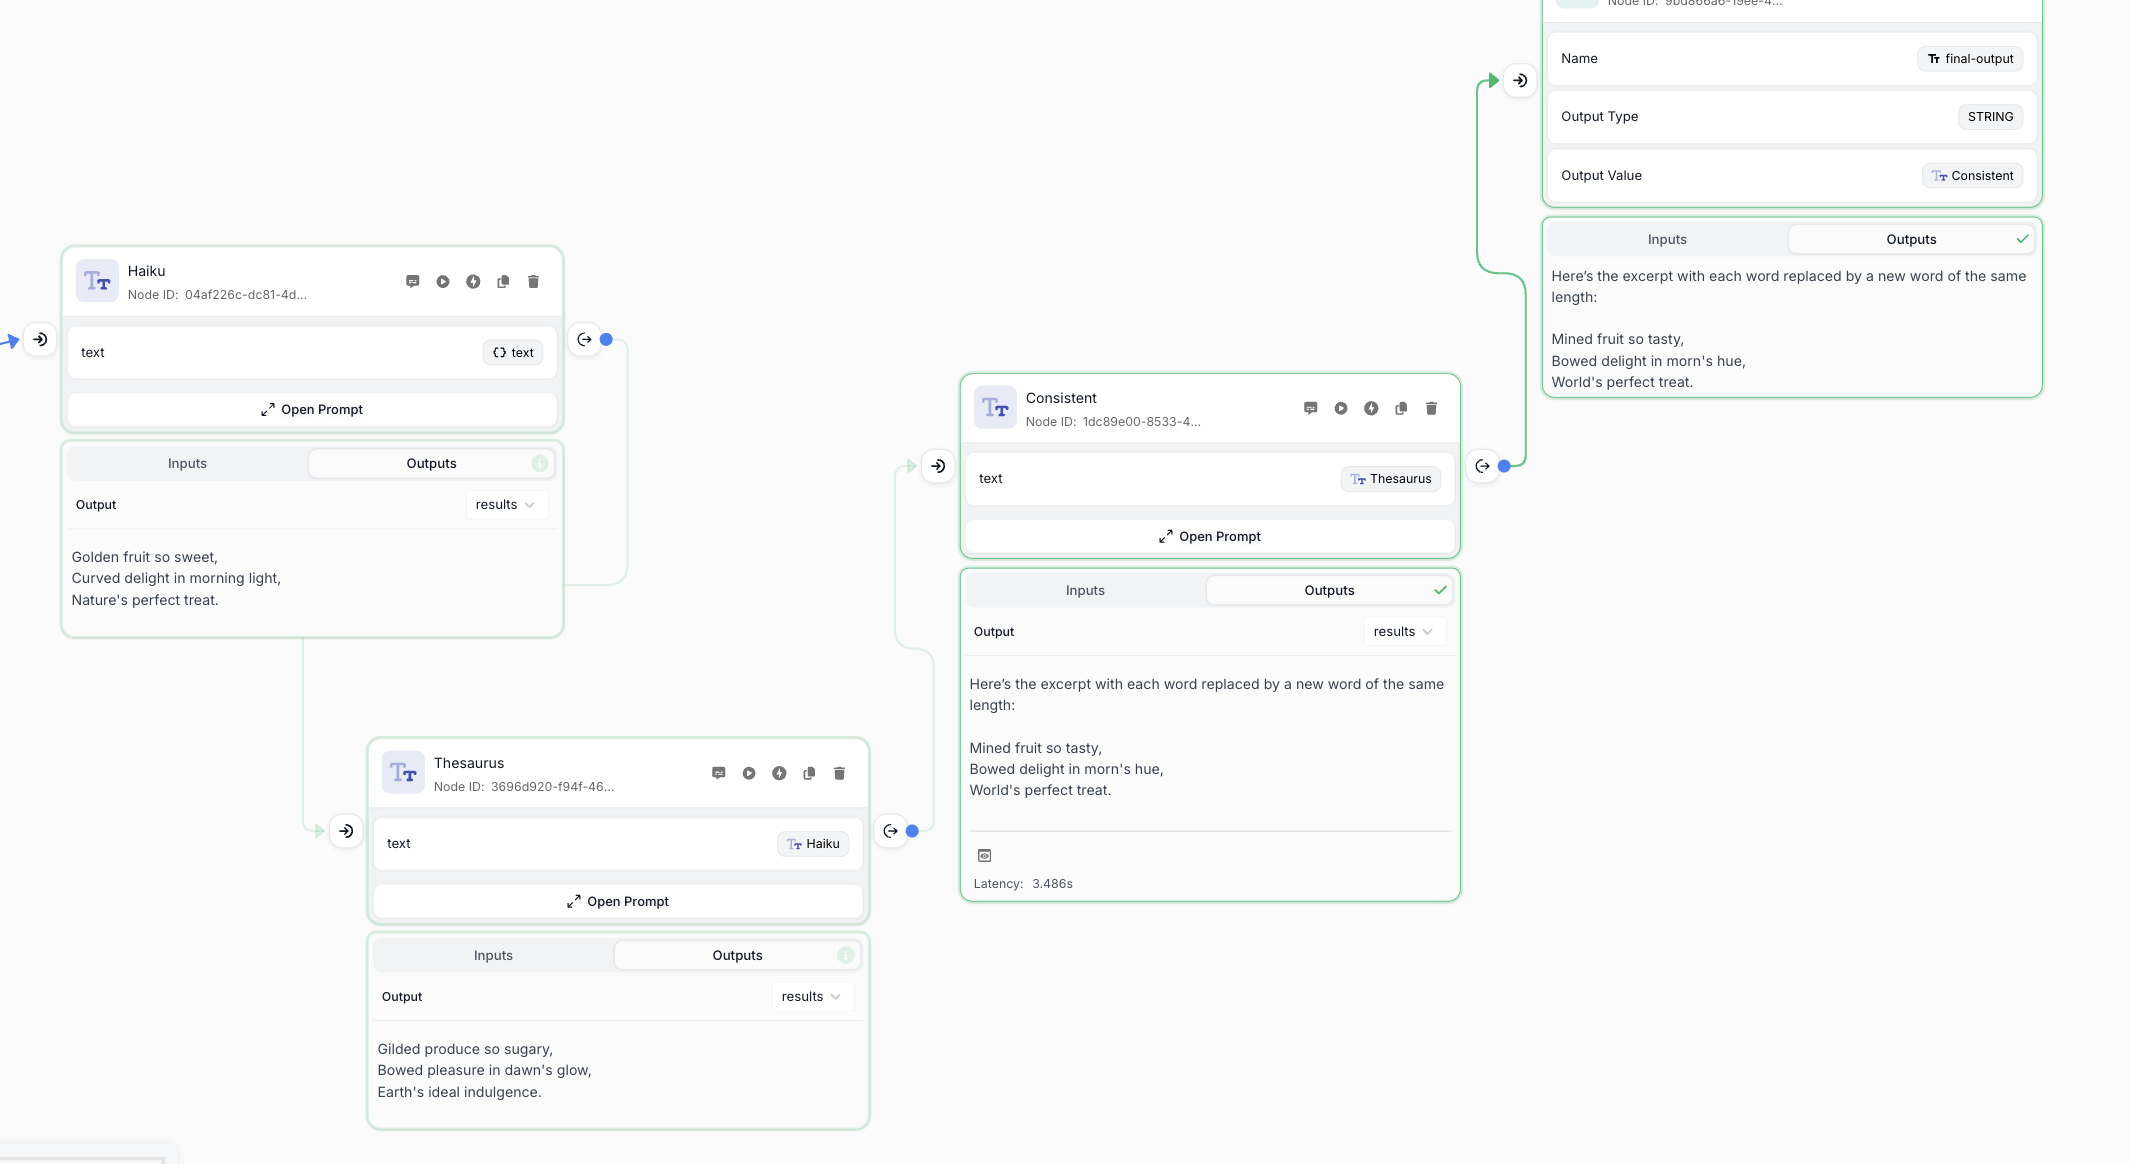
Run From Node
The Run From Node feature allows you to execute a Workflow starting from a specific node, rather than from the beginning. This is particularly useful when you’re iterating on a specific part of your Workflow and don’t want to re-run the entire Workflow each time.
To use this feature:
- First, run your Workflow completely at least once
- When a previous execution is loaded, hover over any node in the Workflow
- Click the mini play button that appears on the node
- The Workflow will execute from that node forward, using the saved state from the previous execution
This feature is available for all SDK-enabled Workflows and uses the state saved from the previous execution to run the Workflow from that exact point in time going forward.
Run From Node is especially useful for:
- Debugging complex Workflows
- Iterating on downstream nodes without re-running expensive upstream operations
- Testing different branches of your Workflow
- Exploring alternative paths through your Workflow
Node Mocking
Workflow development is best done iteratively. However, this can become prohibitively expensive both in terms of token consumption and runtime if there are Prompt Nodes defined early in the Workflow that you have to frequently re-run just to get to the part of the Workflow that you actually want to test. To help speed up Workflow development, you can mock out the execution of a given node. This will skip the node’s execution and return the hard-coded output(s) you define rather than running the node itself.
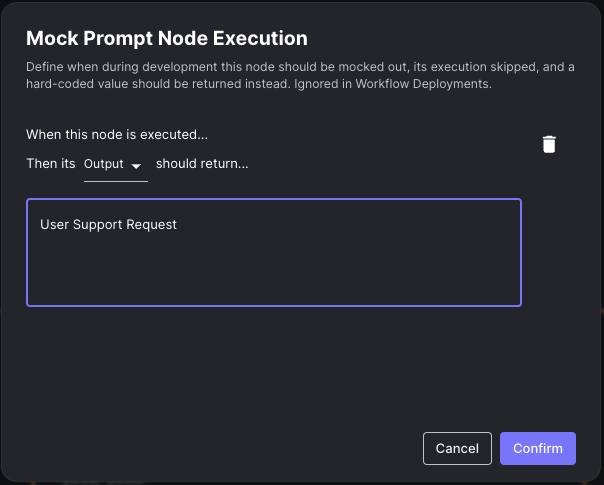
Once defined, you can easily toggle the mock on and off to go back and forth between mocking the node and actually executing the Prompt to see your Workflow work end-to-end. This also allows you to save your mocks without needing to delete them when you’d like to actually execute the node. During a Workflow run, nodes that are mocked will be outlined in yellow to differentiate from nodes that are actually executed.
These mocks are only defined within the context of Workflow Sandboxes, and are defined per Scenario. They do not get deployed with your Workflow Deployments and do not affect behavior when invoking Workflow Deployment APIs.
Cost Optimization with Node Mocking
Node mocking is not only useful for speeding up development but also for reducing costs during the development and testing phase. Since Vellum tracks the cost of Workflow Executions, using mocks for expensive LLM operations can significantly reduce your development expenses while you focus on testing specific parts of your Workflow.
The following nodes support mocking:
- Prompt Nodes
- Subworkflow Nodes
Check out the video below for a full demo of Workflow Node Mocking.