Building a RAG Chatbot from Scratch
Building a RAG Chatbot from Scratch
In this comprehensive tutorial, we’ll walk through building a complete Retrieval Augmented Generation (RAG) chatbot using Vellum’s Workflow Builder. RAG systems combine the power of Large Language Models with external knowledge sources to provide more accurate, context-aware responses while reducing hallucinations.
By the end of this tutorial, you’ll have built a chatbot that:
- Maintains conversation context across multiple turns
- Searches through your document knowledge base
- Provides responses grounded in your specific content
- Gracefully handles questions outside its knowledge scope
What You’ll Learn
Create a foundational chatbot with Chat History support
Upload and configure documents for search and retrieval
Integrate search functionality with LLM responses
Constrain responses to available context
Part 1: Building the Foundation
Step 1: Create Your Workflow
Start by creating a new Workflow in Vellum. You’ll begin with an empty canvas containing just an Entrypoint node.
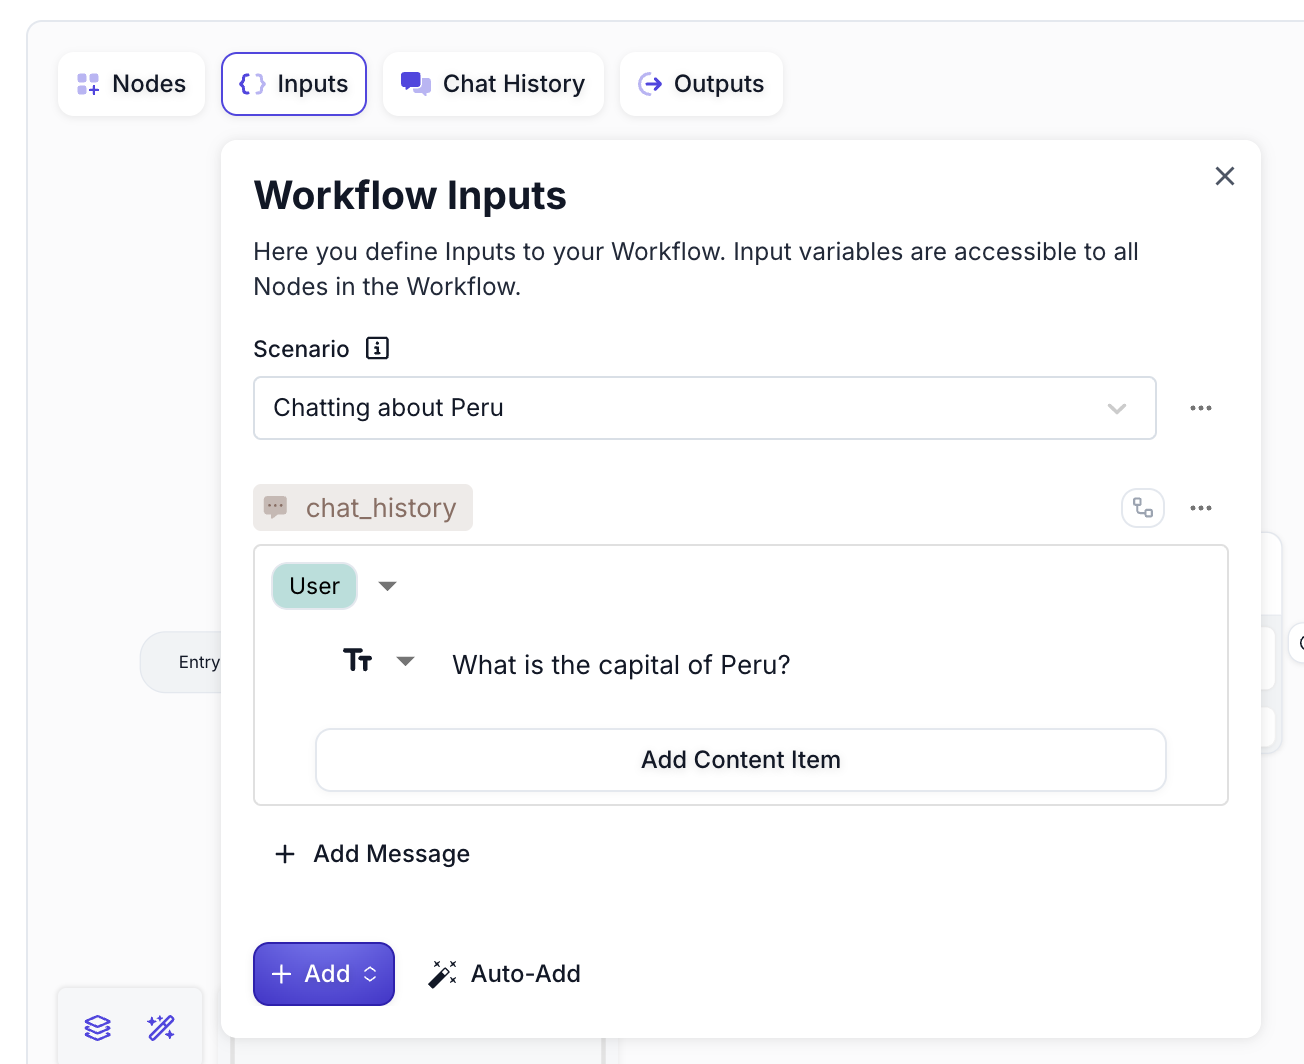
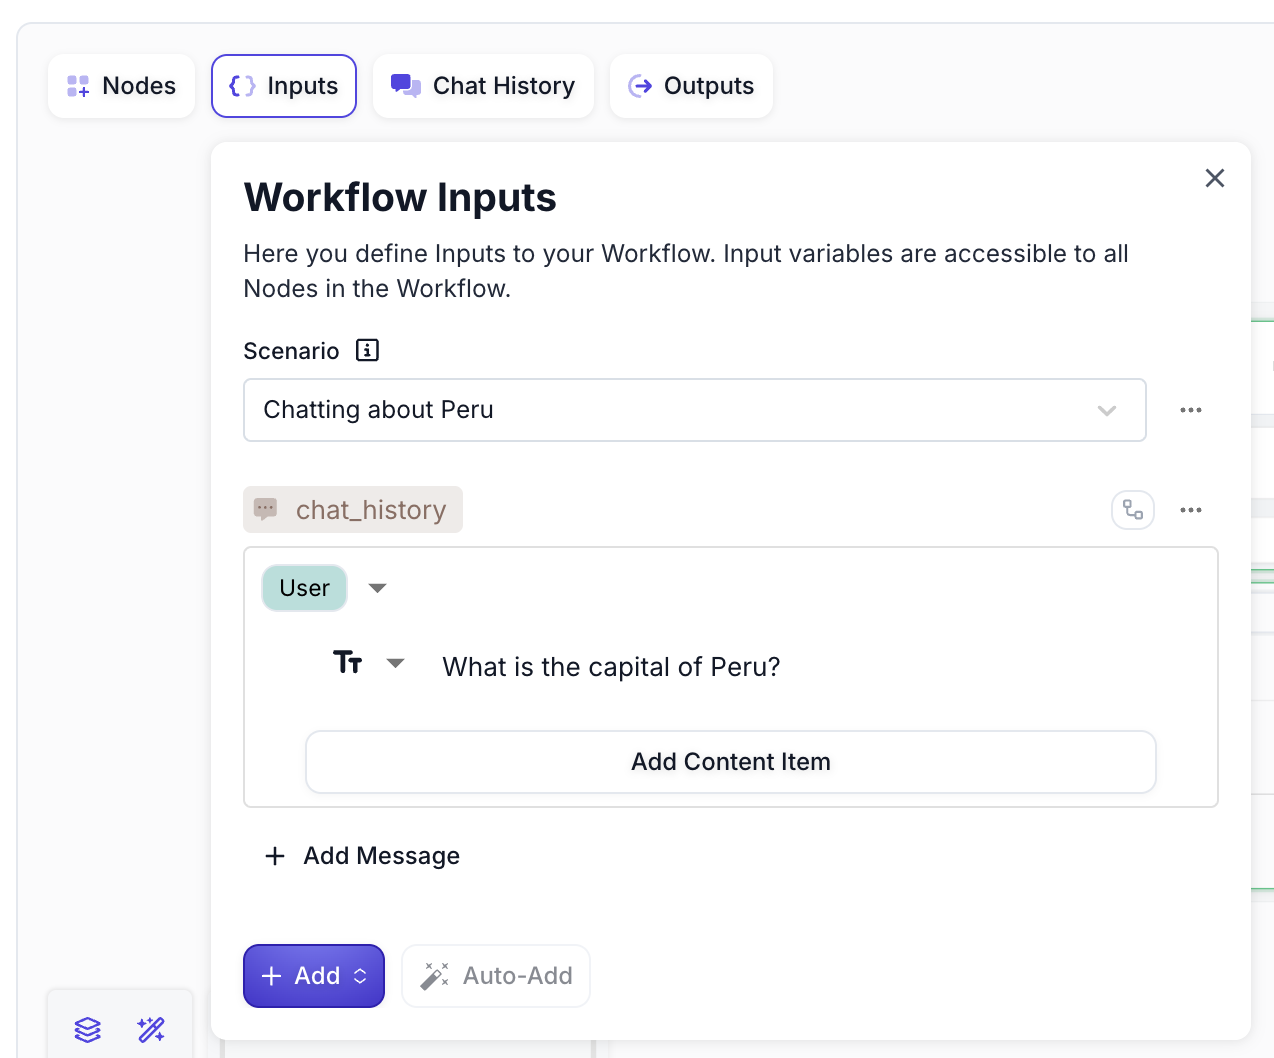
Step 2: Set Up Workflow Inputs
First, configure your workflow to accept chat history as input:
- Click on the Inputs tab in the left sidebar
- Click Add and select Chat History from the dropdown
- Add a test message to simulate user input
Step 3: Add and Configure the Prompt Node
- Drag from the Entrypoint node to create a connection and select Prompt from the node panel
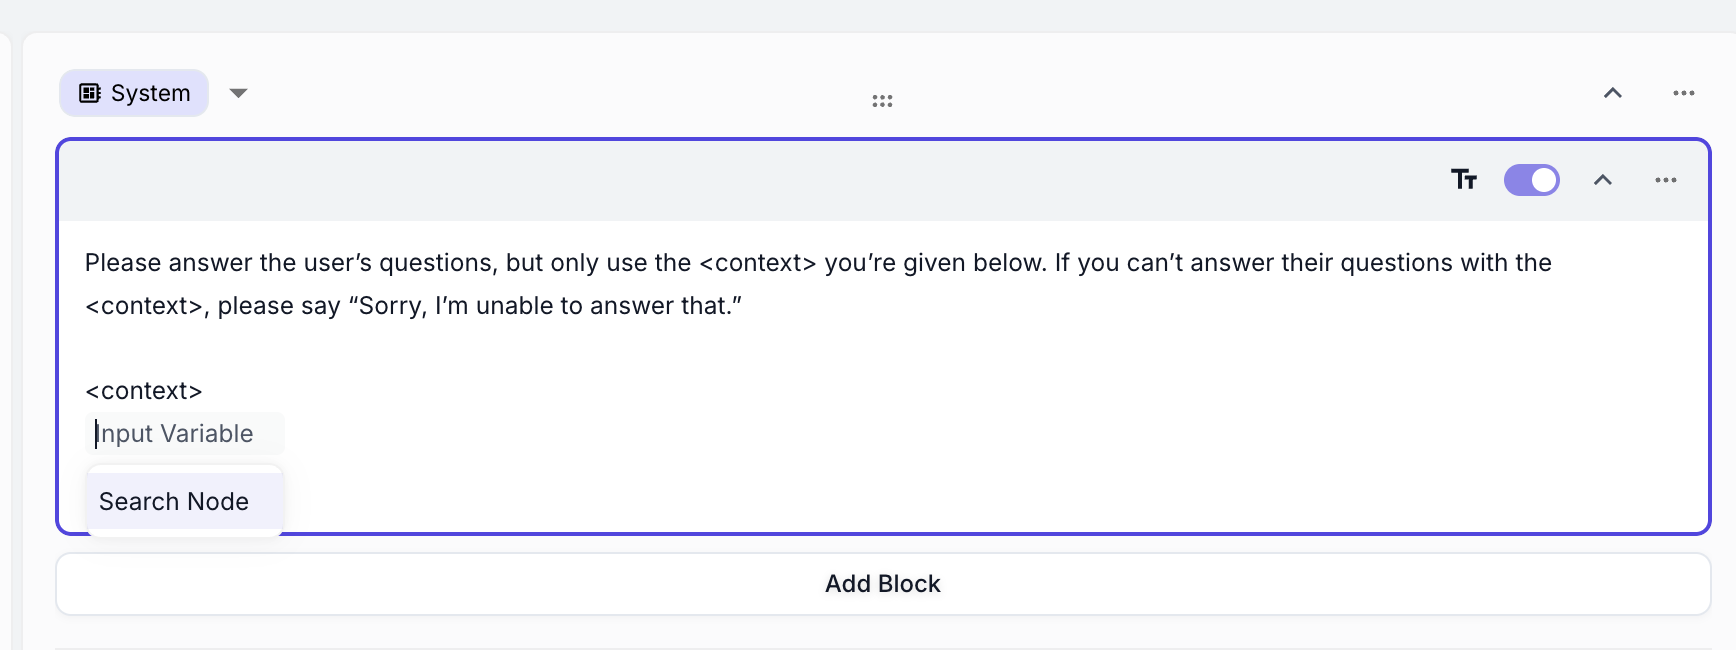
- In the Prompt Node configuration, update the system prompt to include context constraints:
- Add a Chat History input variable and connect it to your workflow’s chat history
- Connect the Prompt Node to the Final Output Node
The context tags in the prompt are placeholders - we’ll populate them with search results in the next section.
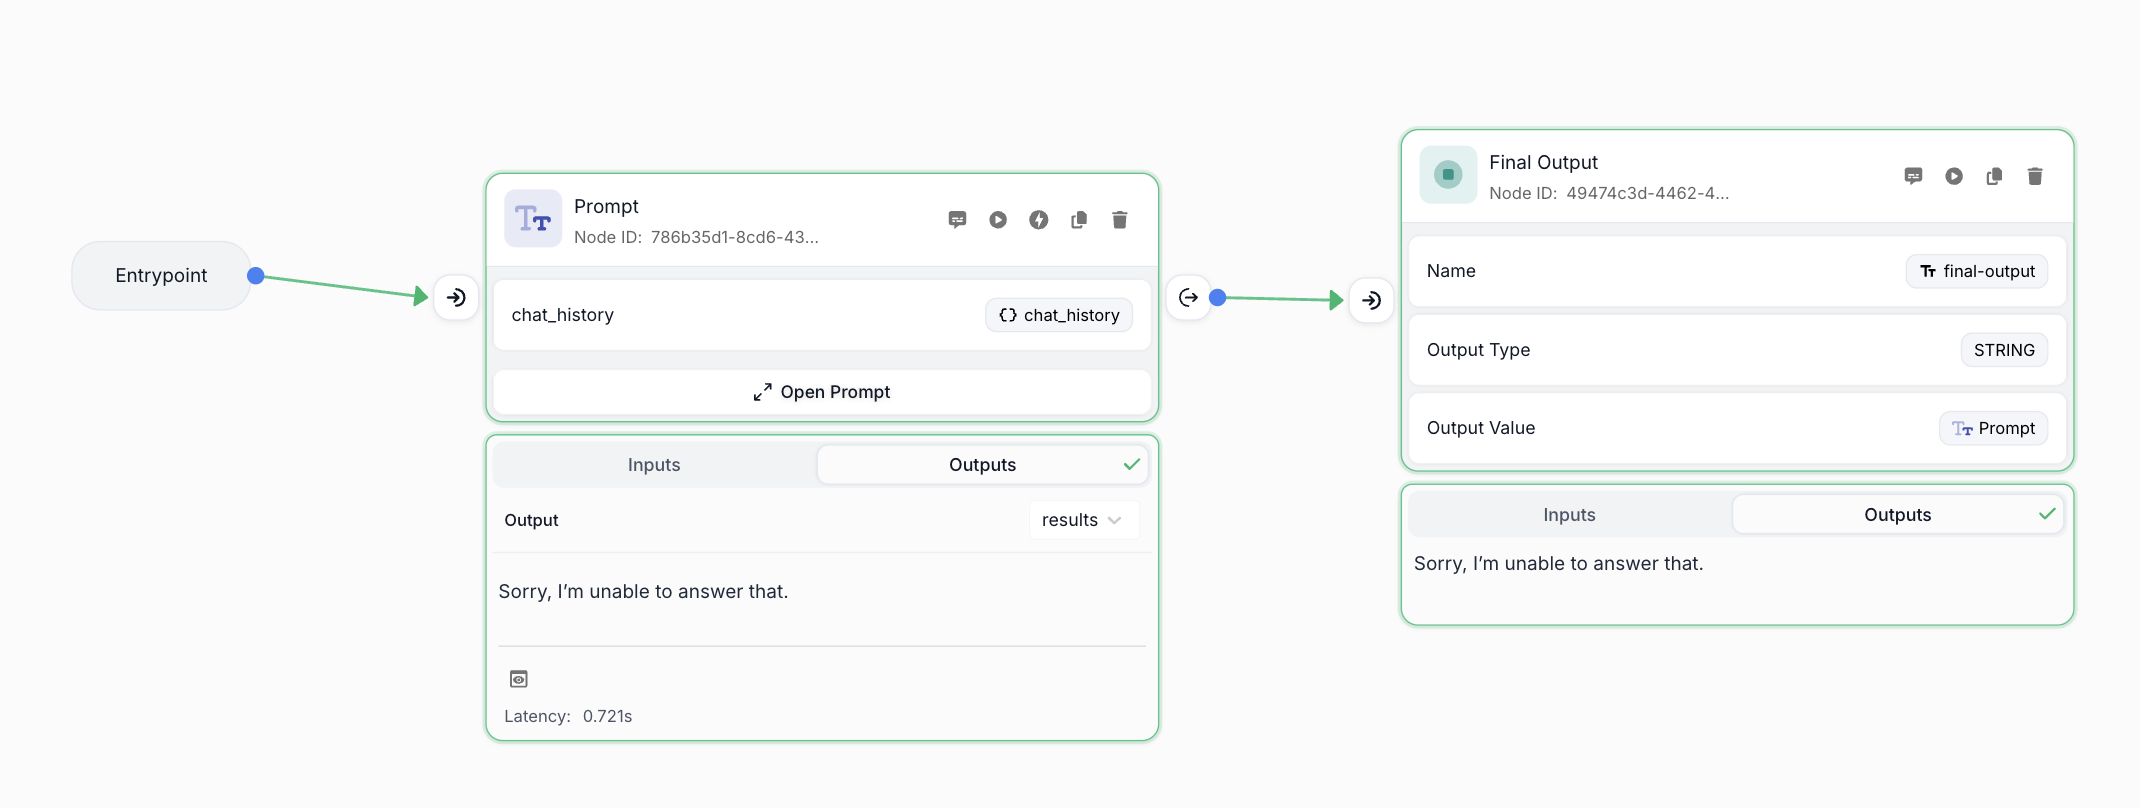
Step 4: Test the Basic Setup
Before adding RAG capabilities, test your basic chatbot:
- Ensure your Chat History contains only one user message (remove any assistant responses from previous tests)
- Run the workflow
You should see output similar to this, where the chatbot correctly responds that it cannot answer without context:
Part 2: Creating Your Knowledge Base
Step 5: Create a Document Index
Now we’ll create a Document Index to store your knowledge base:
- Navigate to the Document Indexes page
- Click Create Index in the top right corner

- Name your index (e.g., “Countries”) and configure the settings:
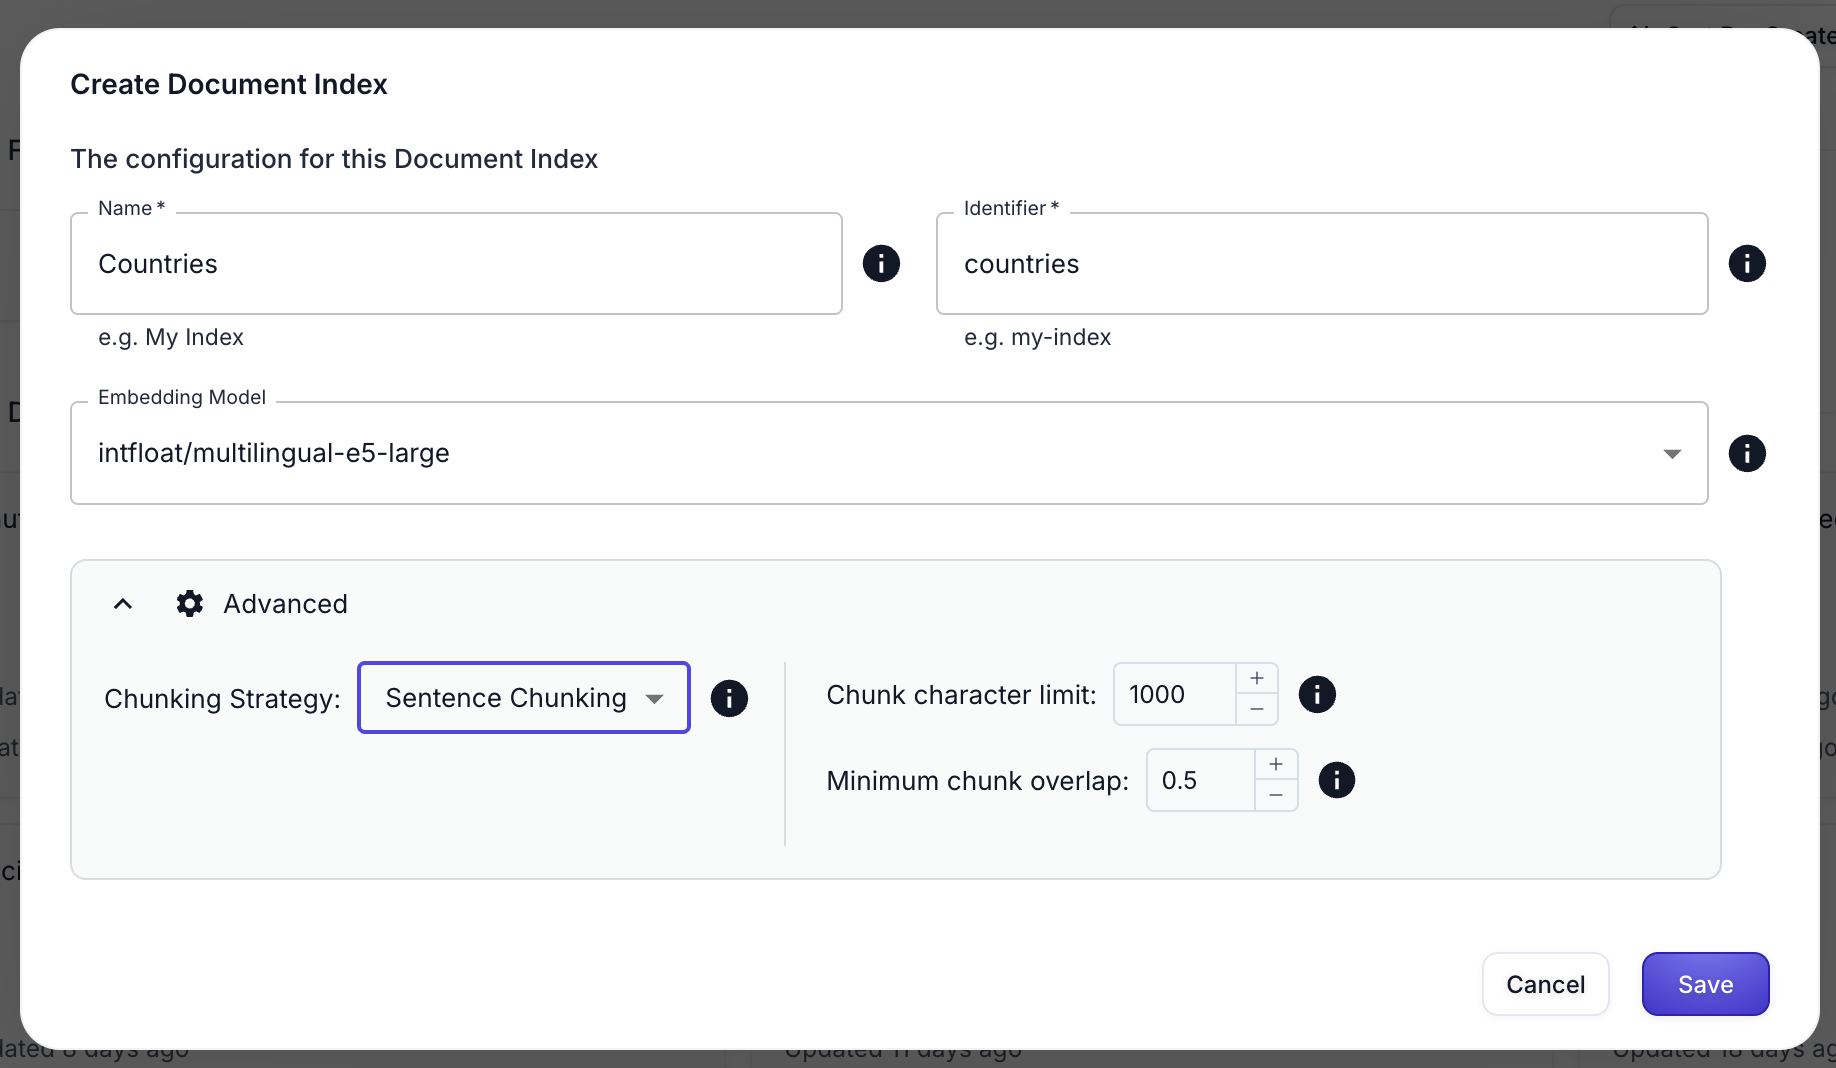
You can read more about Document Index configuration options and chunking strategies in our documentation.
- Click Save to create your index
Step 6: Upload Documents
After creating your index, you’ll see the upload interface:
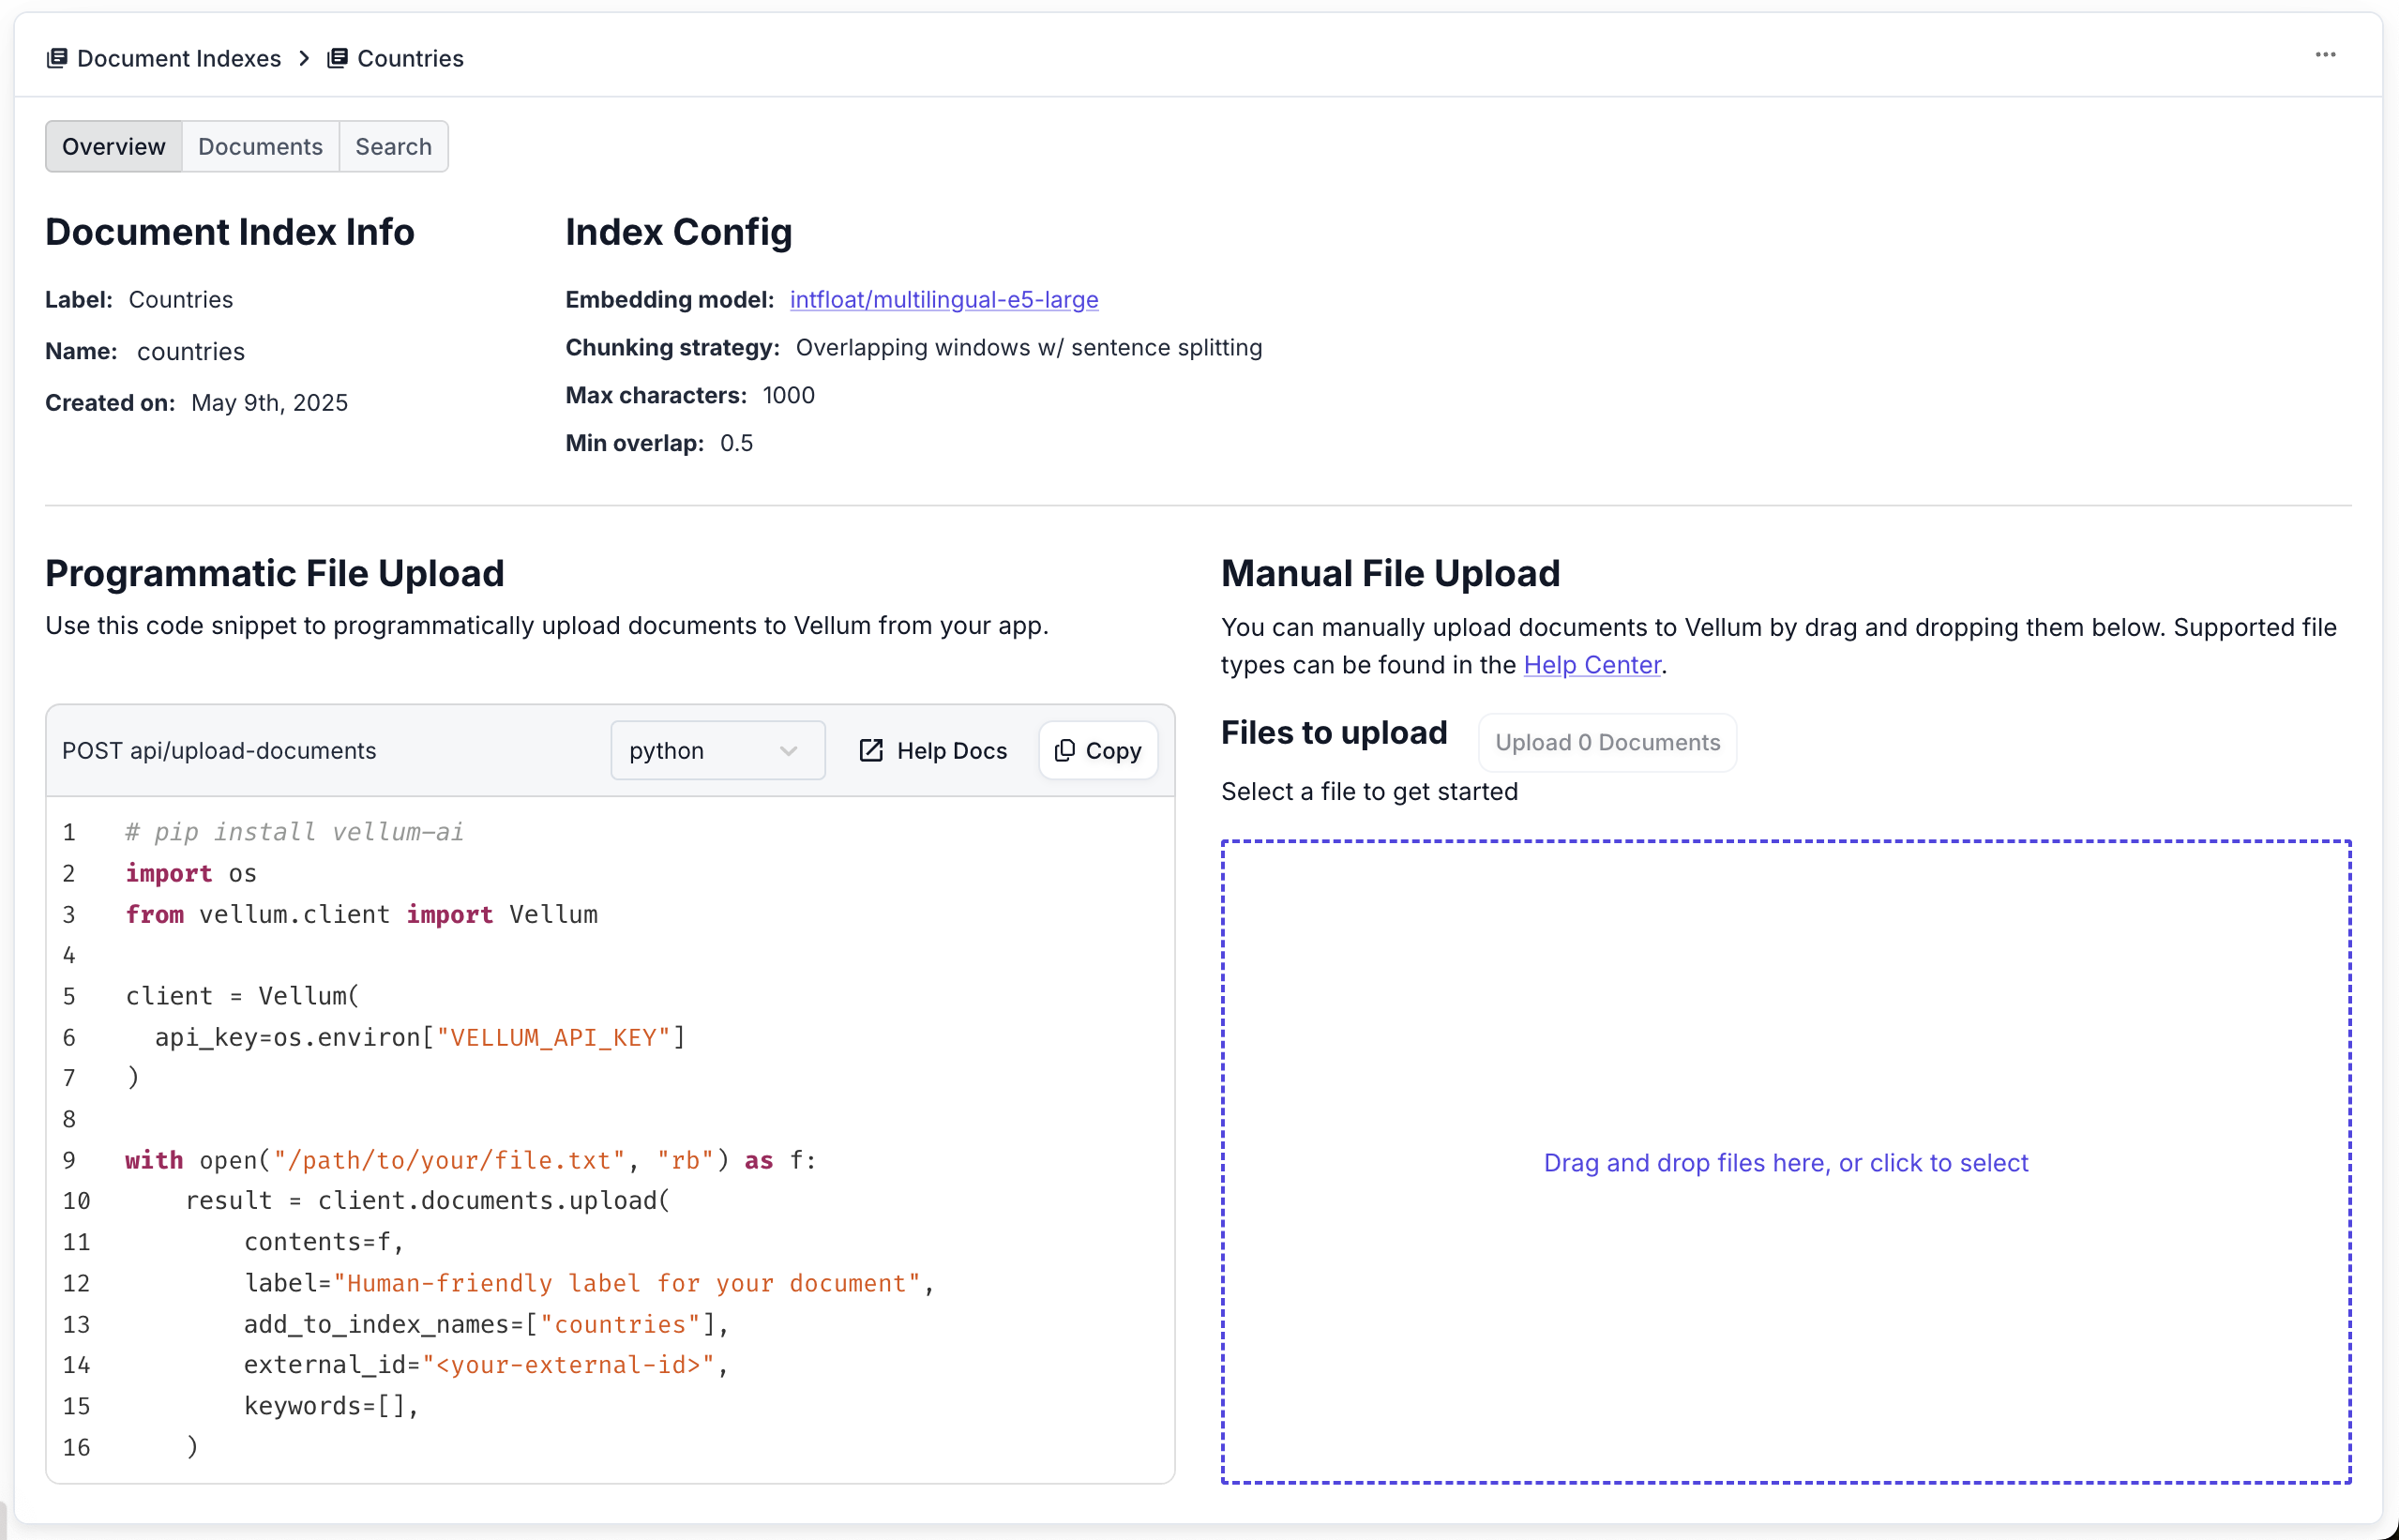
Vellum supports various file types including:
- PDF documents
- Word documents (DOCX)
- Text files (TXT)
- CSV files
- PowerPoint presentations (PPTX)
- HTML files
Drag and drop your documents or click to select files for upload.
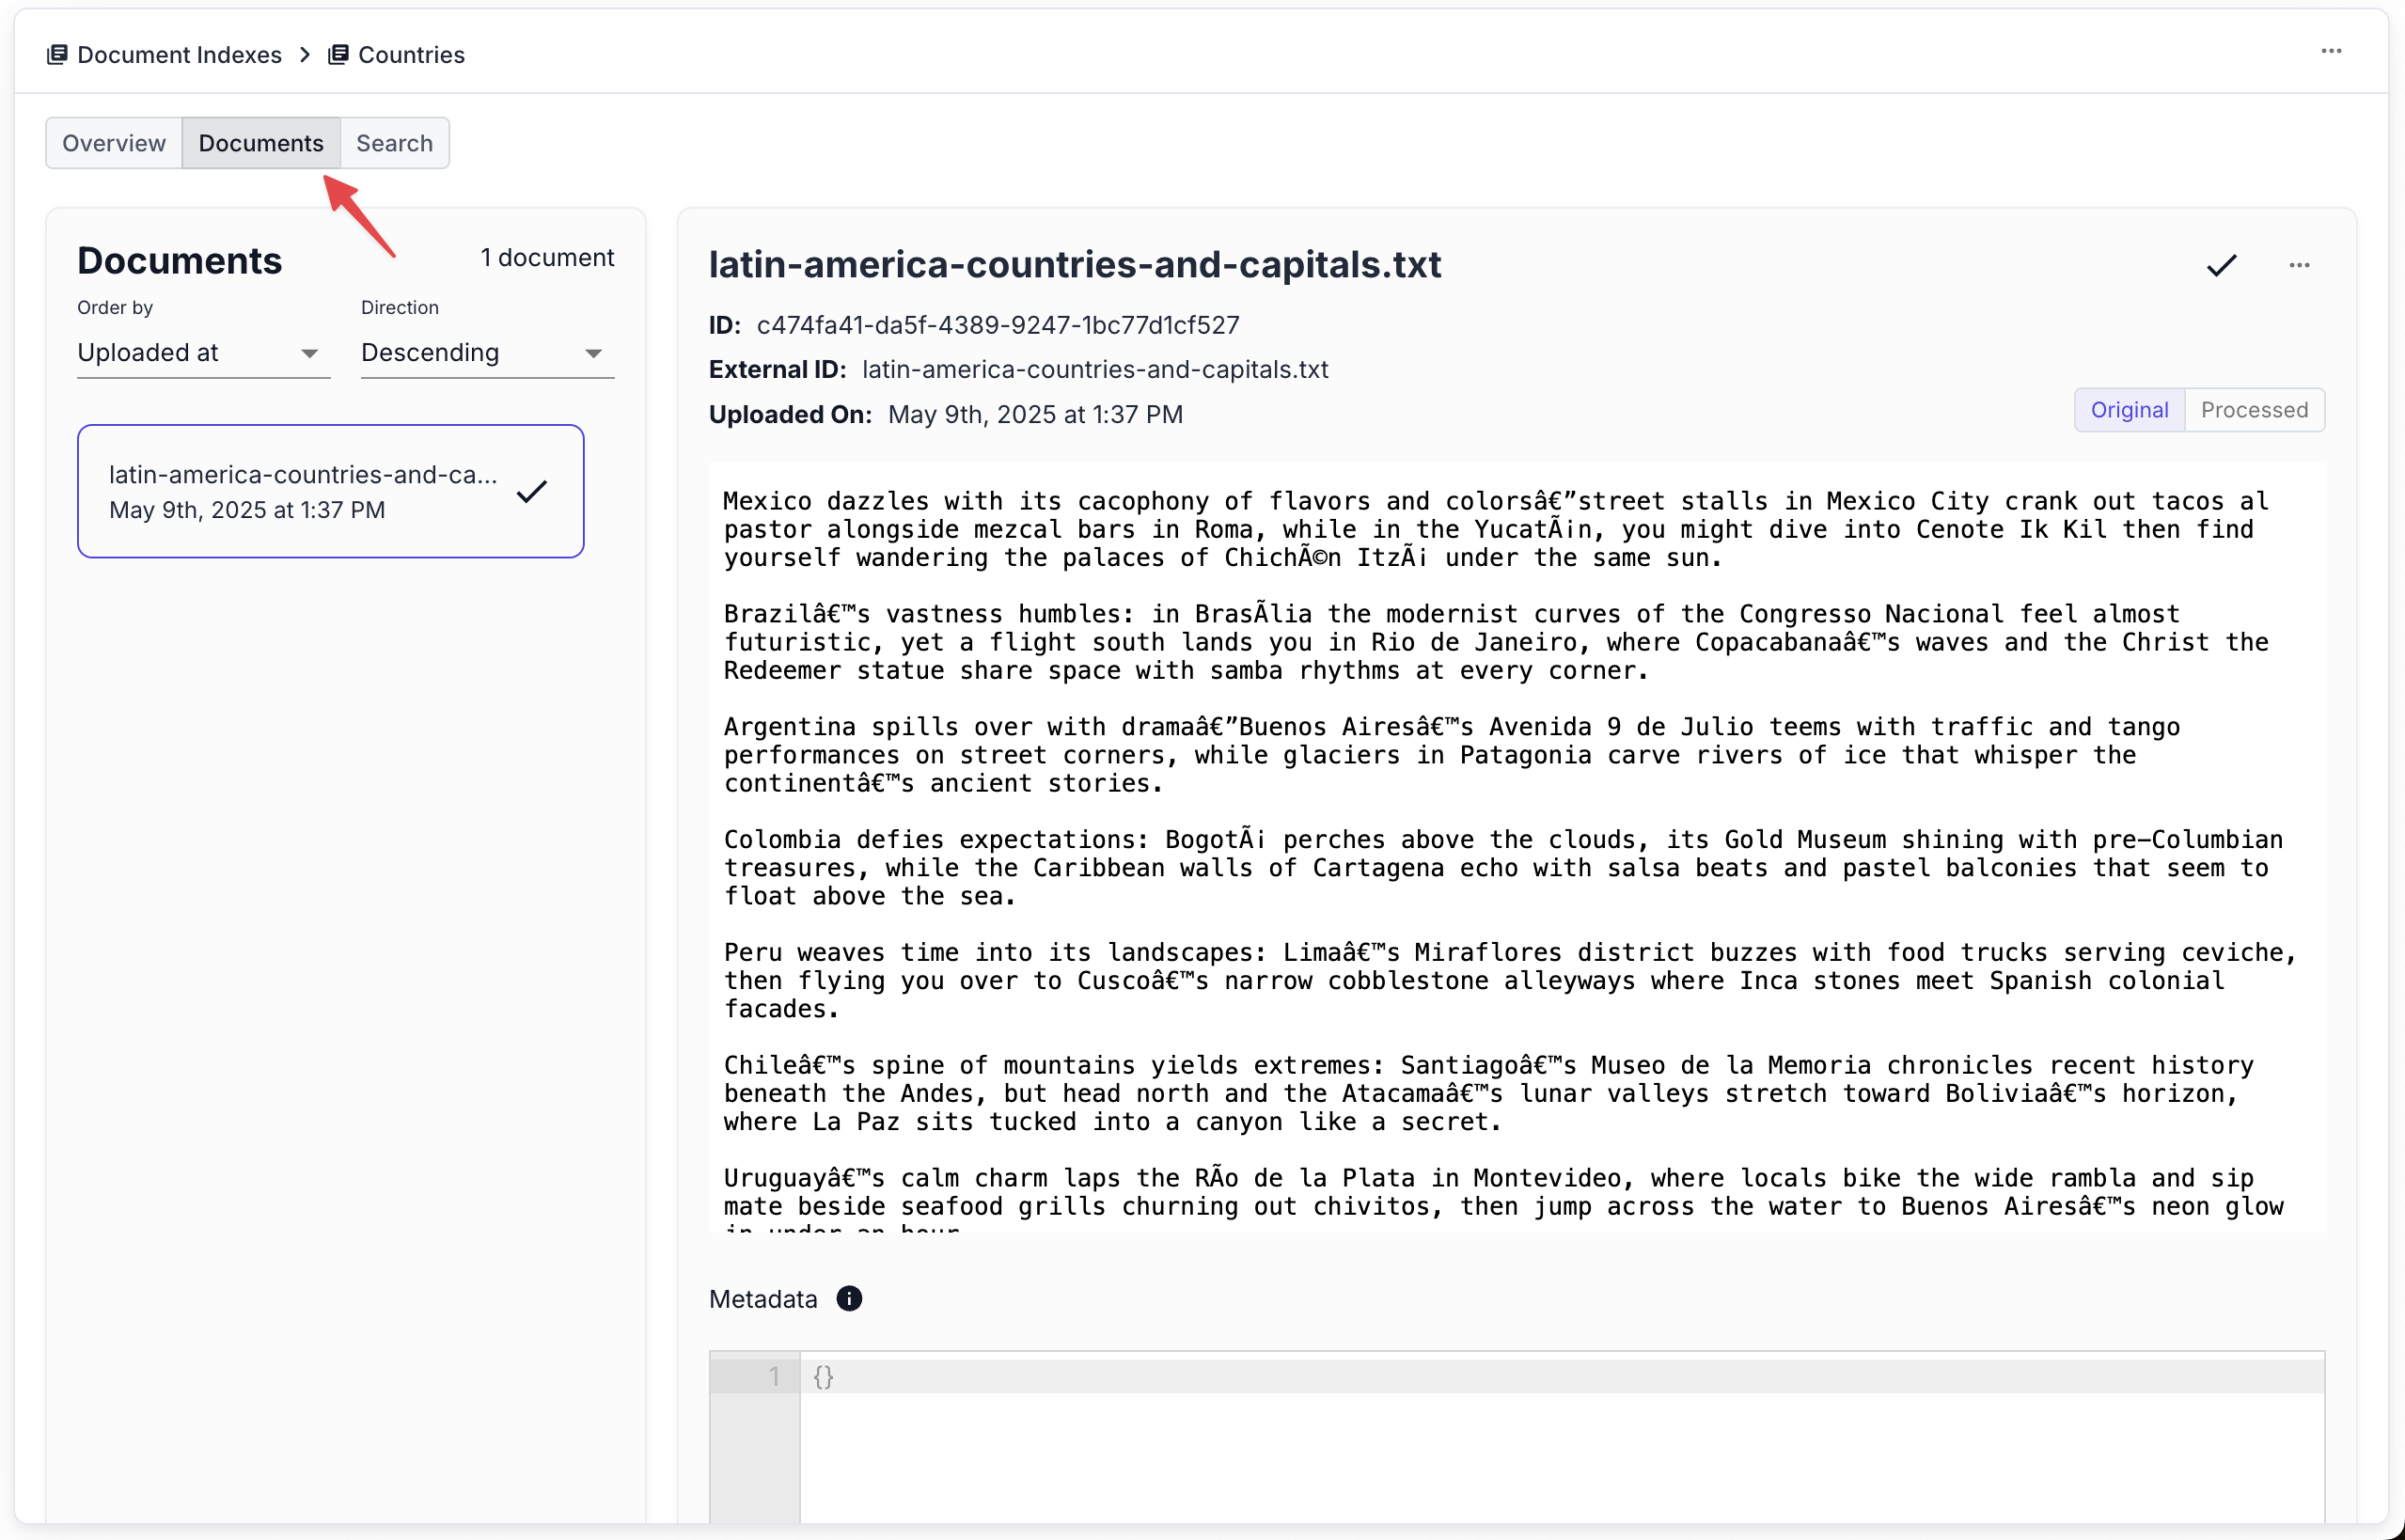
Step 7: Preview Your Documents
Once uploaded, you can preview your documents to ensure they were processed correctly:
Part 3: Implementing RAG Functionality
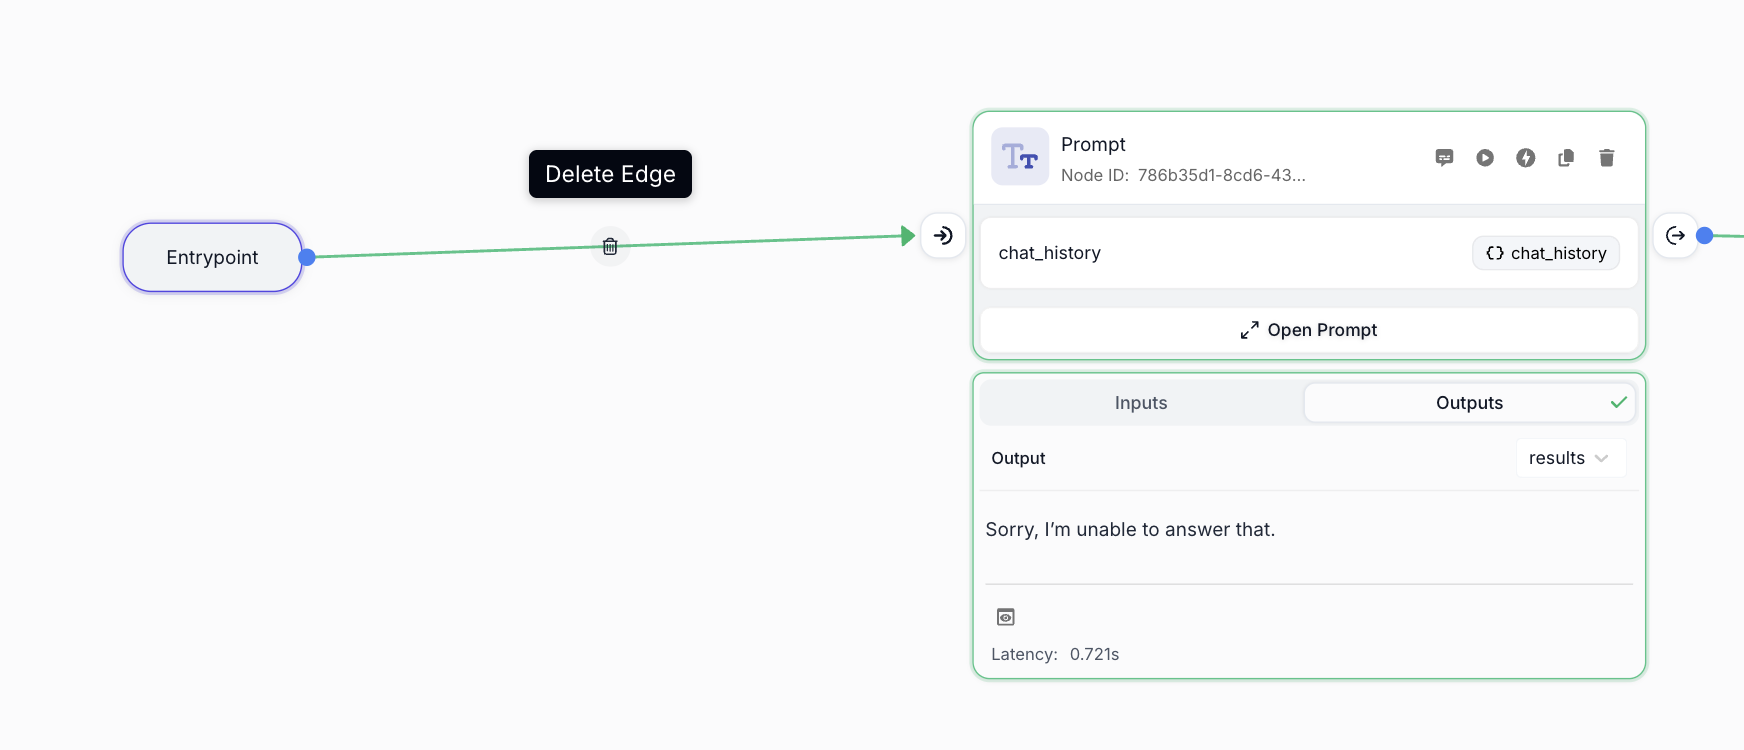
Step 8: Restructure Your Workflow
Now we’ll modify the workflow to include document search:
- Delete the existing connection between Entrypoint and Prompt Node:
- Click on the edge between nodes
- Press Backspace or click the Delete icon
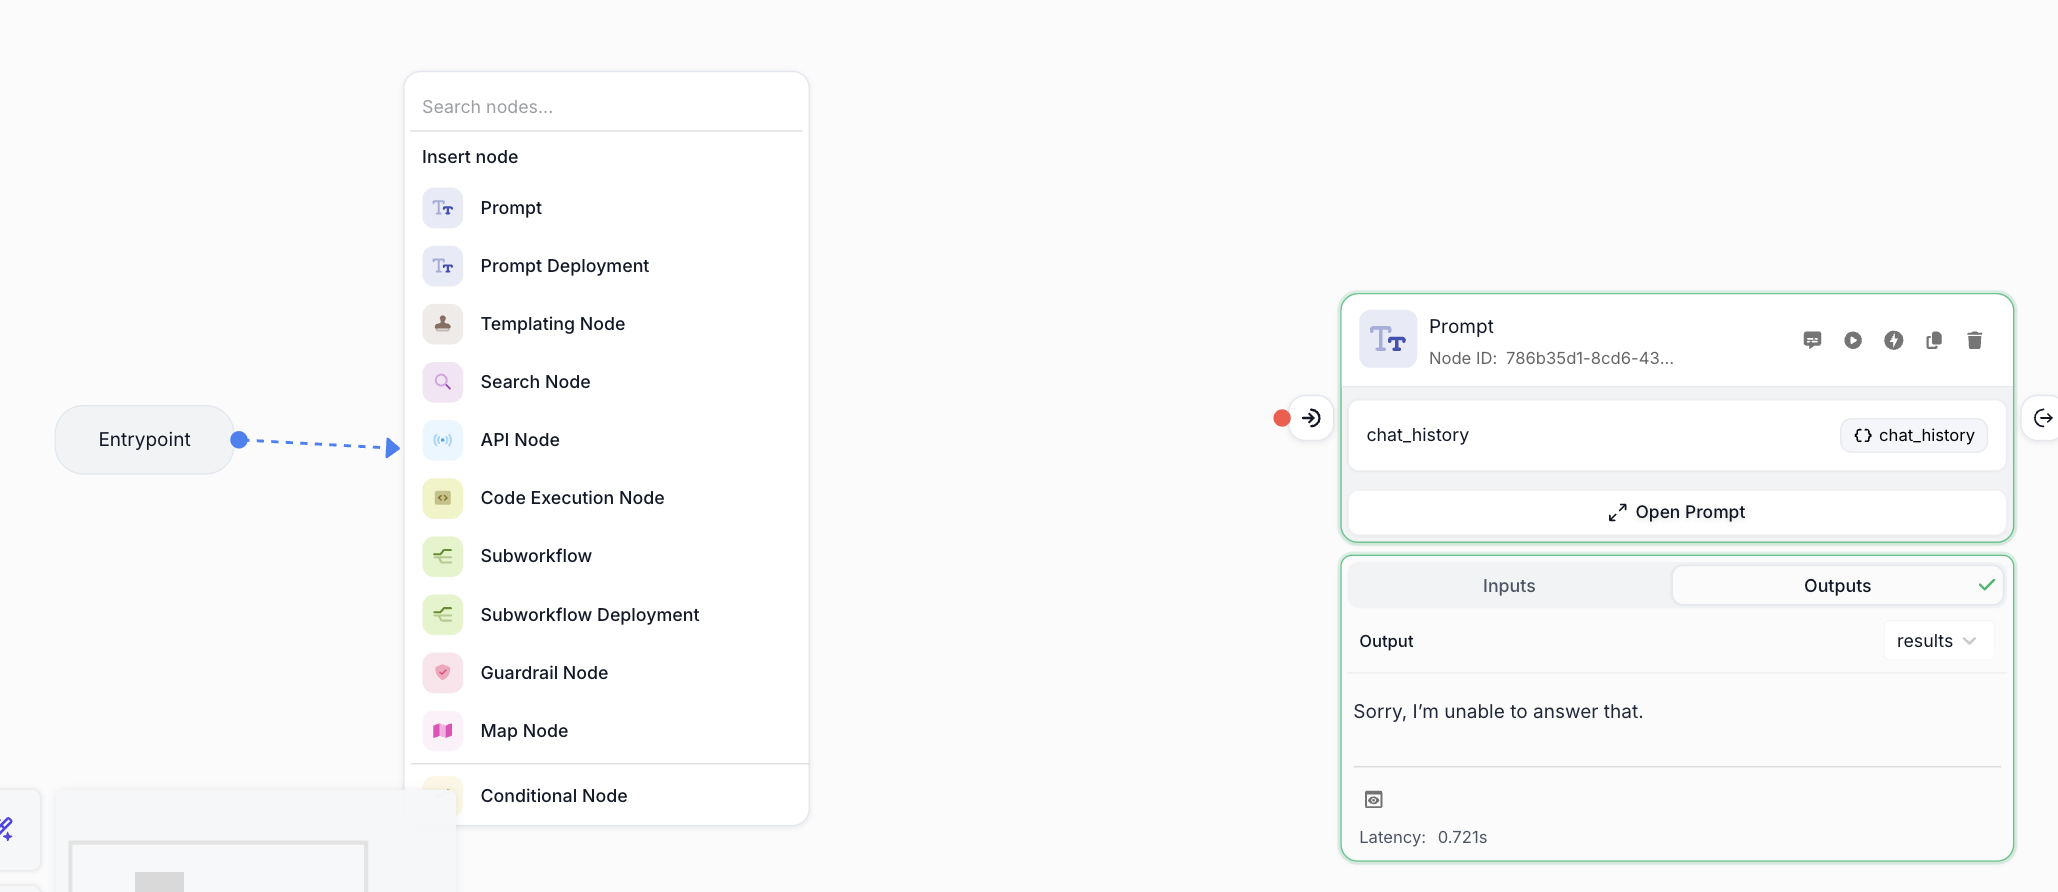
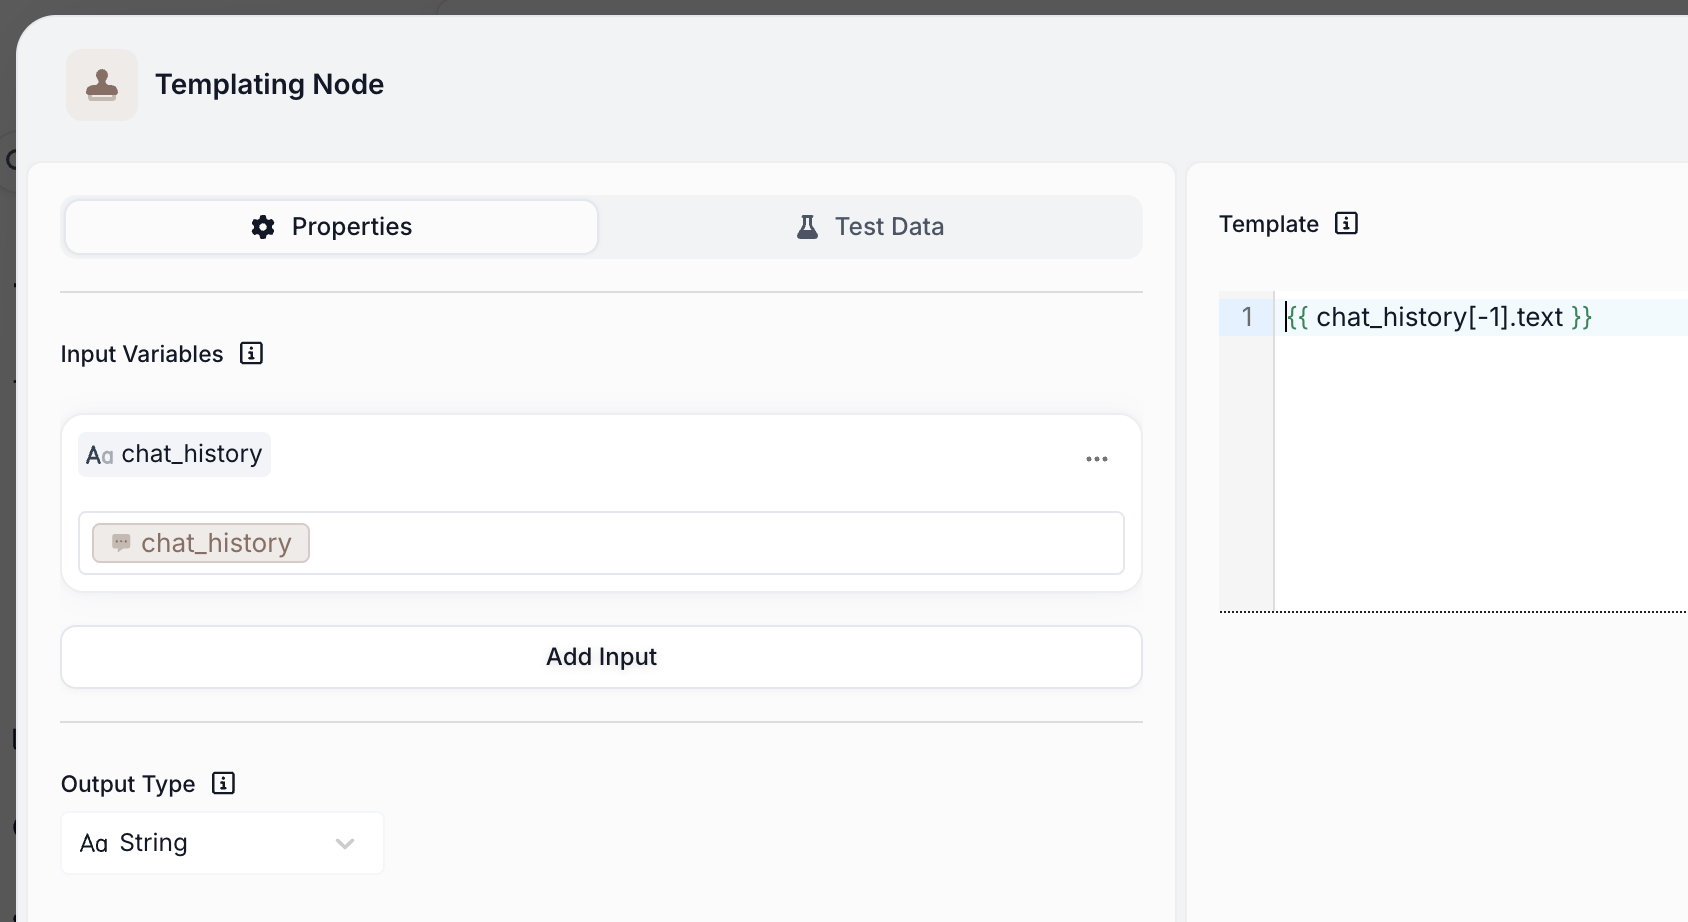
Step 9: Add a Templating Node
We’ll use a Templating Node to extract the most recent user message for our search query:
- Create a Templating Node between the Entrypoint and Prompt Node
- Configure the Templating Node:
- Connect
chat_historyas an input variable - Use this template to extract the latest user message:
- Connect
-
Optional: Rename the node to “Current User Message” for clarity
-
Test the Templating Node by running the workflow:
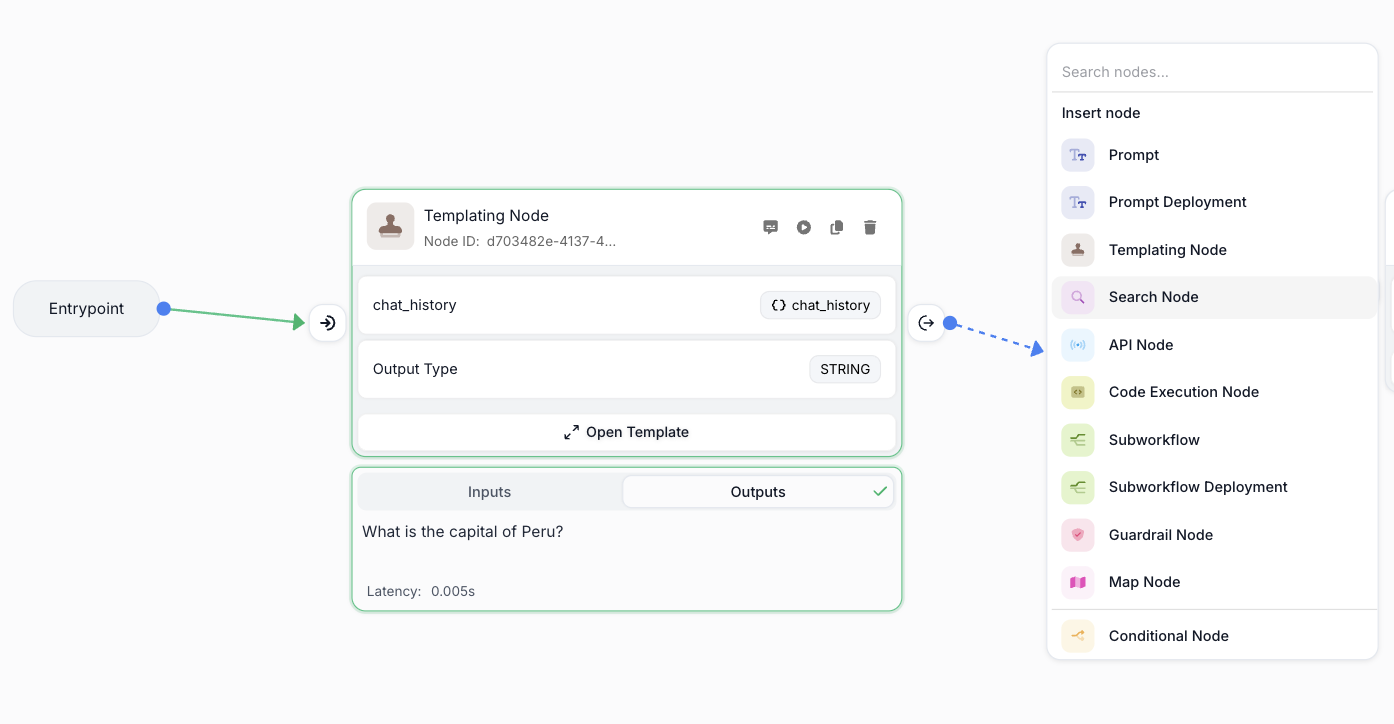
Step 10: Add a Search Node
- Drag from the Templating Node to create a new connection and select Search Node
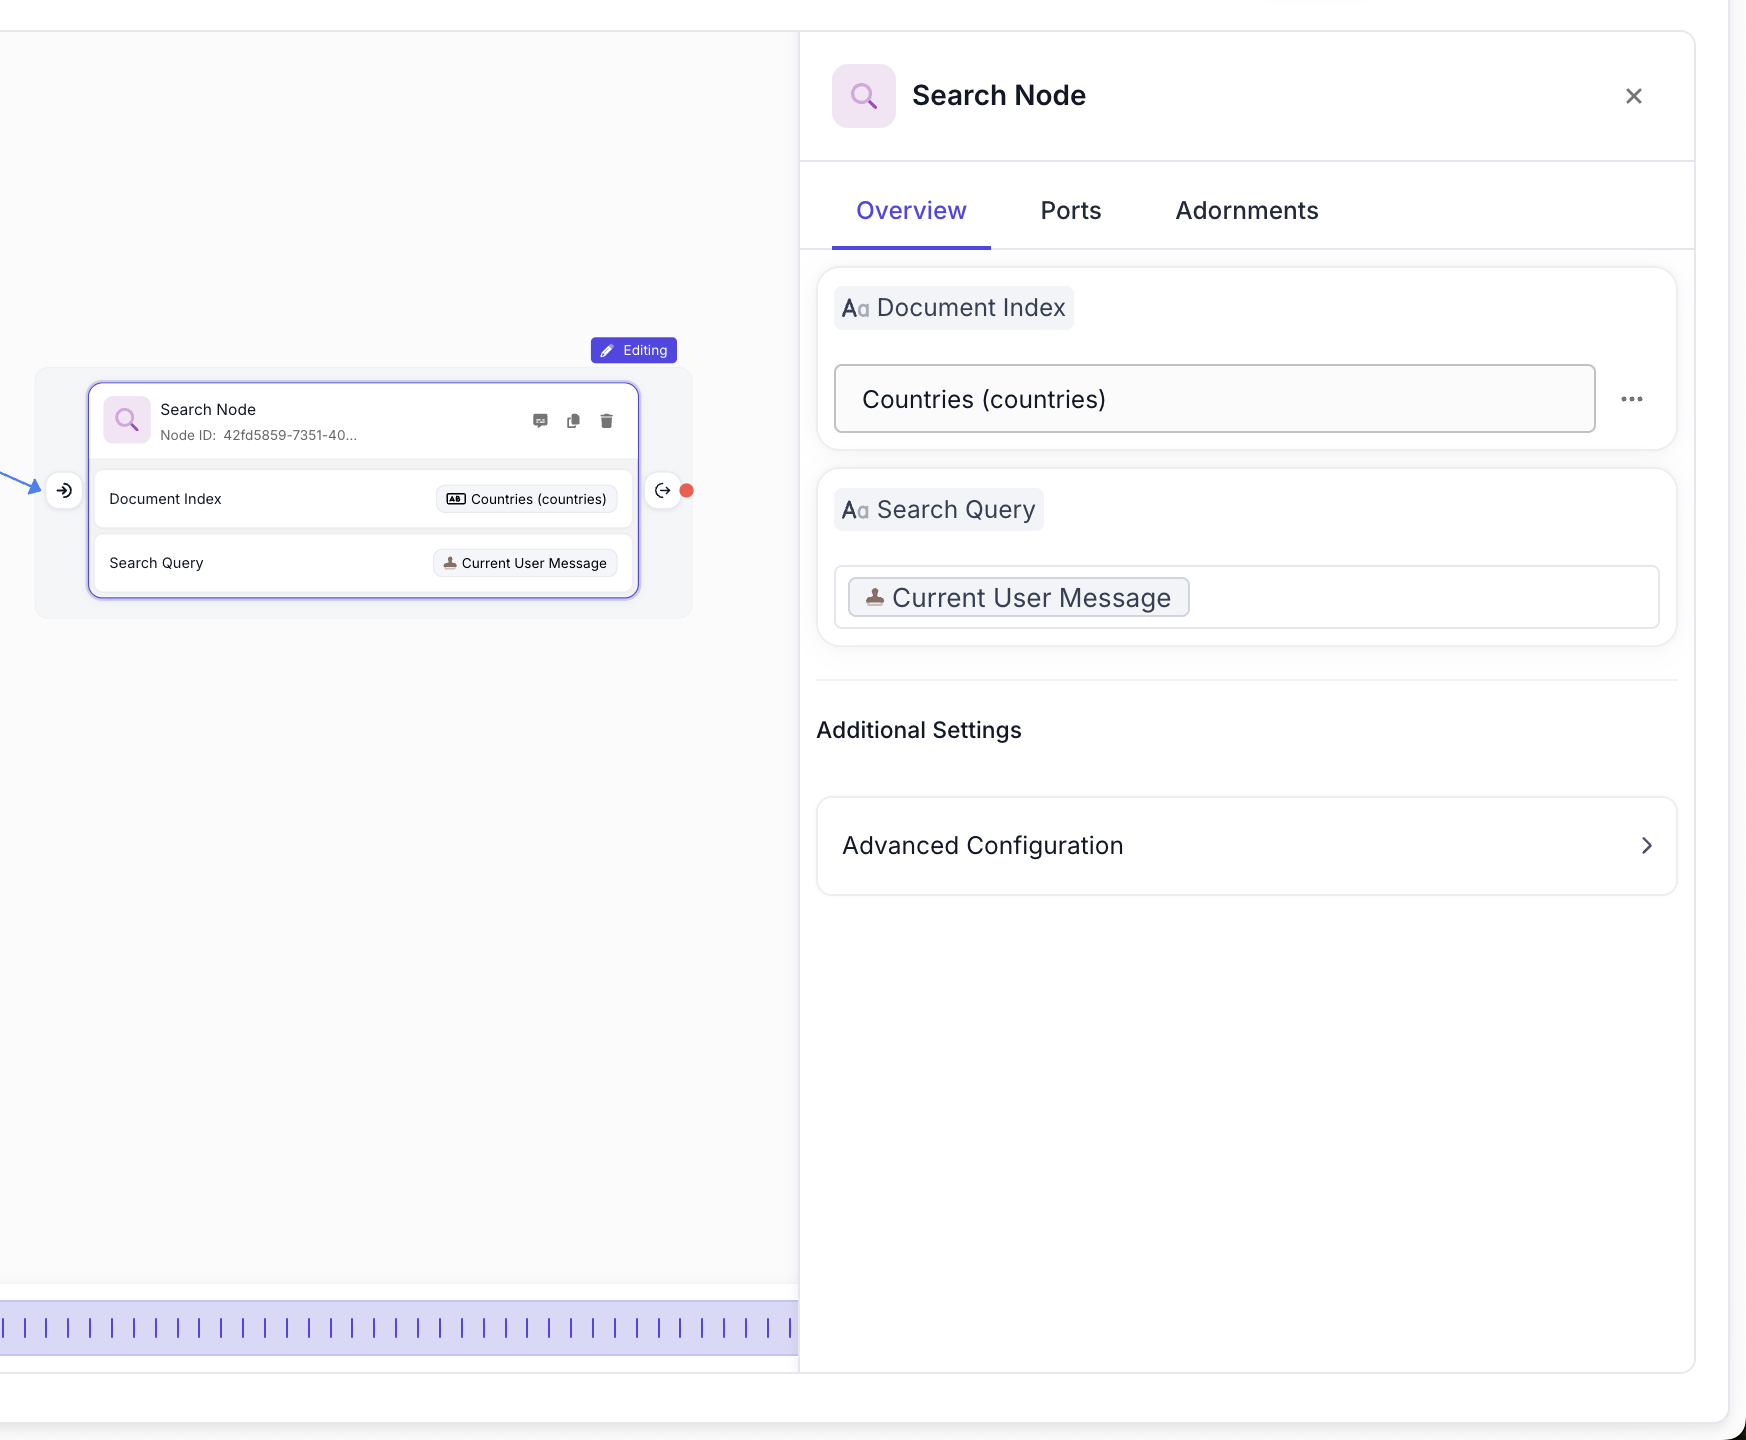
- Configure the Search Node:
- Document Index: Select your “Countries” index
- Search Query: Connect to the “Current User Message” output
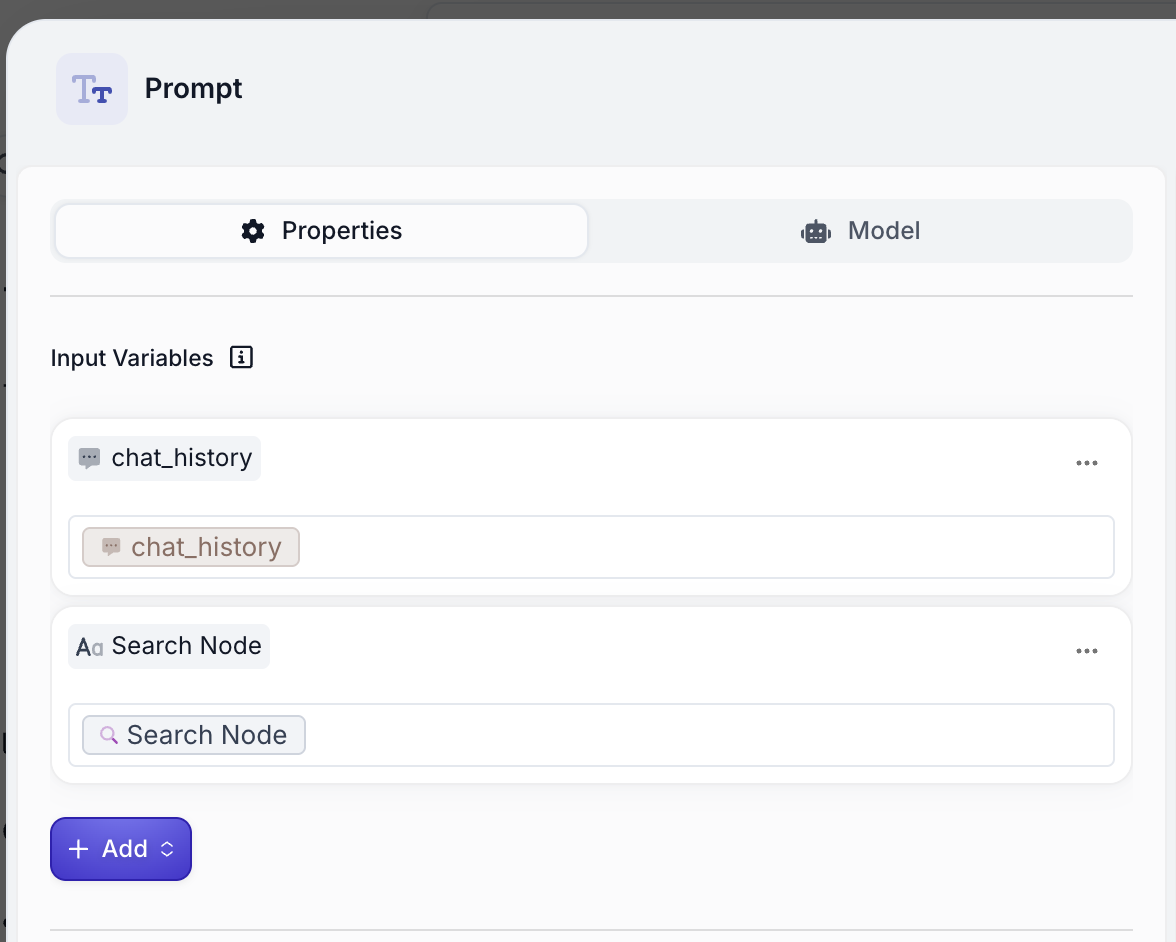
Step 11: Connect Search Results to the Prompt
- Connect the Search Node to your Prompt Node
- In the Prompt Node, add a new input variable of type String
- Connect this input to the Search Node output
Step 12: Insert Search Results into the Prompt
- Place your cursor between the
<context>tags in your prompt - Press the / key to open the variable insertion dropdown
- Select the Search Node results to insert them into the context
Part 4: Testing Your RAG Chatbot
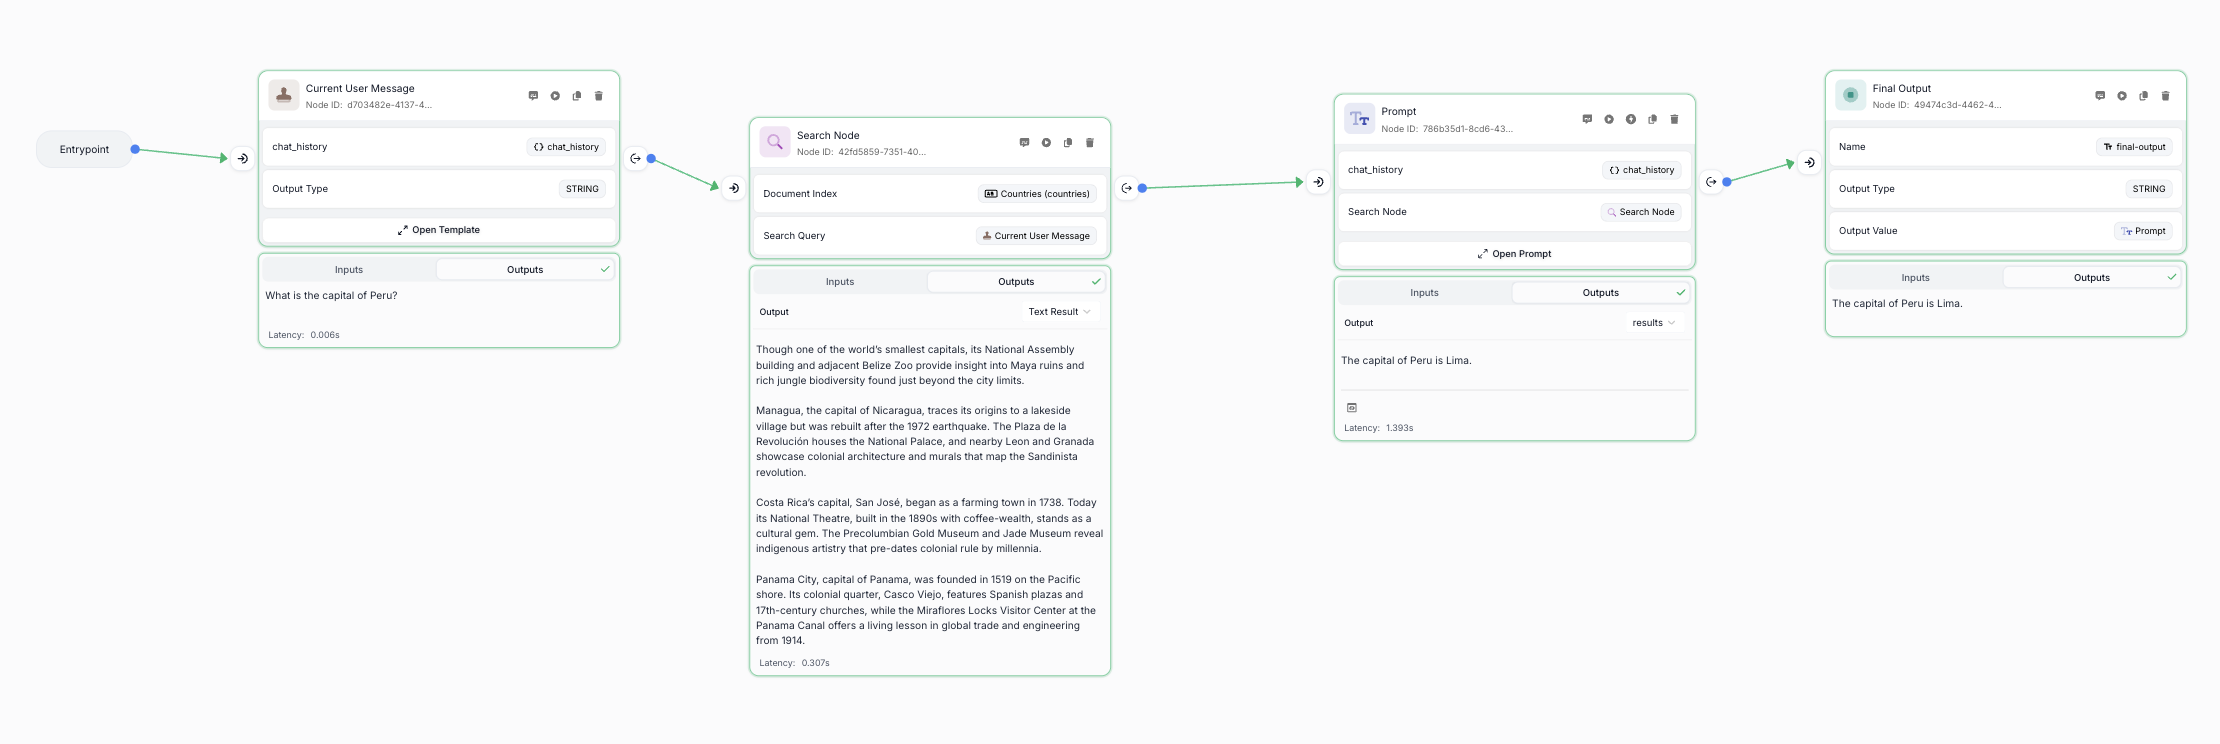
Step 13: Run the Complete RAG Workflow
Now test your complete RAG implementation:
- Ensure your chat history contains a question that can be answered from your documents
- Run the workflow
- Observe how the chatbot now provides context-aware responses based on your document content
Step 14: Test Edge Cases
Test your chatbot with various scenarios:
Questions Within Knowledge Base
Ask questions that can be answered using your uploaded documents. The chatbot should provide accurate, context-grounded responses.
Questions Outside Knowledge Base
Ask questions about topics not covered in your documents. The chatbot should respond with “Sorry, I’m unable to answer that.”
Multi-turn Conversations
Test follow-up questions and conversation continuity using the Chat History tab.
Advanced Enhancements
Adding Source Citations
To make your RAG chatbot even more useful, consider implementing source citations. This will be covered in a future tutorial, but you can explore:
- Using metadata from search results
- Formatting citations in responses
- Providing document references
Optimizing Search Performance
Fine-tune your RAG system by:
- Adjusting chunking strategies in your Document Index
- Experimenting with different search weights
- Implementing metadata filtering for more precise results
Evaluation and Monitoring
Consider setting up:
- RAG-specific evaluation metrics
- Online evaluations for production monitoring
- Cost tracking for your workflow executions
Key Takeaways
By constraining responses to provided context, RAG systems significantly reduce hallucinations
The workflow’s modular design makes it easy to modify and extend functionality
Using Templating Nodes to extract user queries enables precise document searches
Document Indexes can be updated independently without changing the workflow
Next Steps
Now that you have a working RAG chatbot, consider exploring:
- Evaluating RAG Pipelines - Learn how to measure and improve your RAG system’s performance
- Advanced Chunking Strategies - Optimize how your documents are processed and stored
- Metadata Filtering - Add more sophisticated search capabilities
- Workflow Deployment - Deploy your chatbot to production